Posemaking: Basics & Prep
Creating a pose from scratch can seem pretty daunting if you’ve never done it before. Luckily it’s not as hard as it seems! With the help of Anamnesis (and this guide) you’ll be making beautiful poses in no time.
This guide is part of a three part series that covers my process in creating poses. Before we get started I recommend having a look at the tool to familiarize yourself with the interface a little, but no prior experience will be required.
If after this guide you are left with questions, you are of course welcome to ask in our Discord. You might also be able to find the answer you are looking for on the official Anamnesis Wiki.
Not here for the basics? No worries, you can skip ahead to part 2 or part 3. When skipping ahead, please do have a quick read through the summary at the start of each guide covering what you may have missed in the previous part. Without any further ado, let’s get right into it!
Dressing down your character
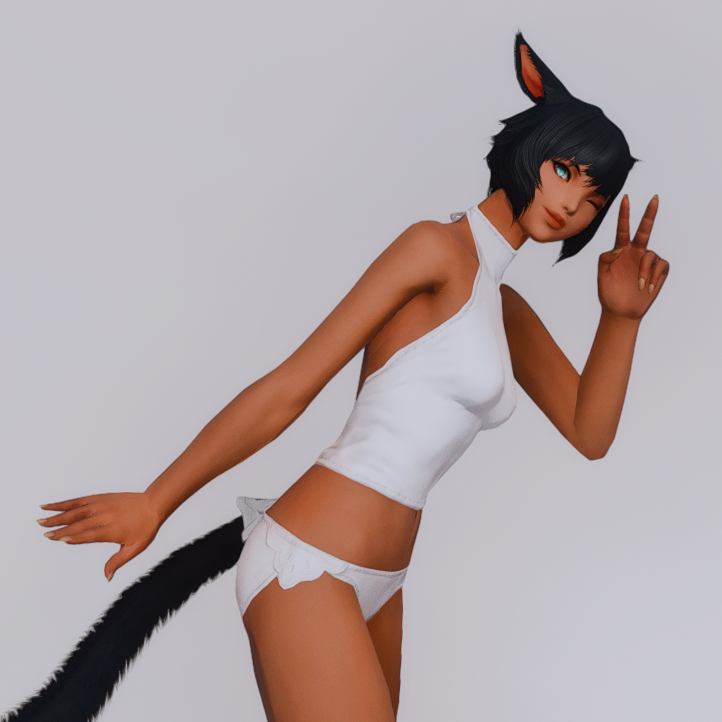
If you’ve snooped around this website before, you might be familiar with the way I style my preview shots. If not, to quickly catch you up, I leave my characters dressed down to their underwear for thumbnails and previews. While in part this is to reduce the time it takes to take screenshots, the primary reason is to give both the viewer and myself a clear and clean view of any potential flaws in the pose.
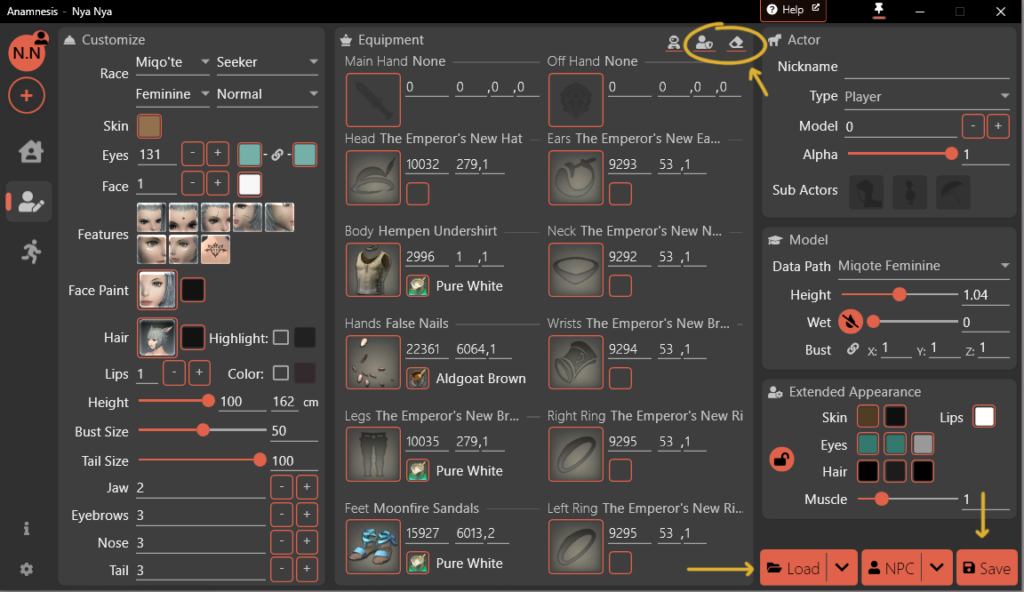
You can save your character’s appearance and load it in at later times. This means that whenever you start a pose you can simply load your character of choice in, already wearing their birthday suit.Alternatively, you can also use the “Remove all Equipment” button top right in the character tab. In case you are using mods and don’t want your character to end up dressed down even further, you can also use the button to the left of it for the NPC small clothes.
What’s the point to doing this?
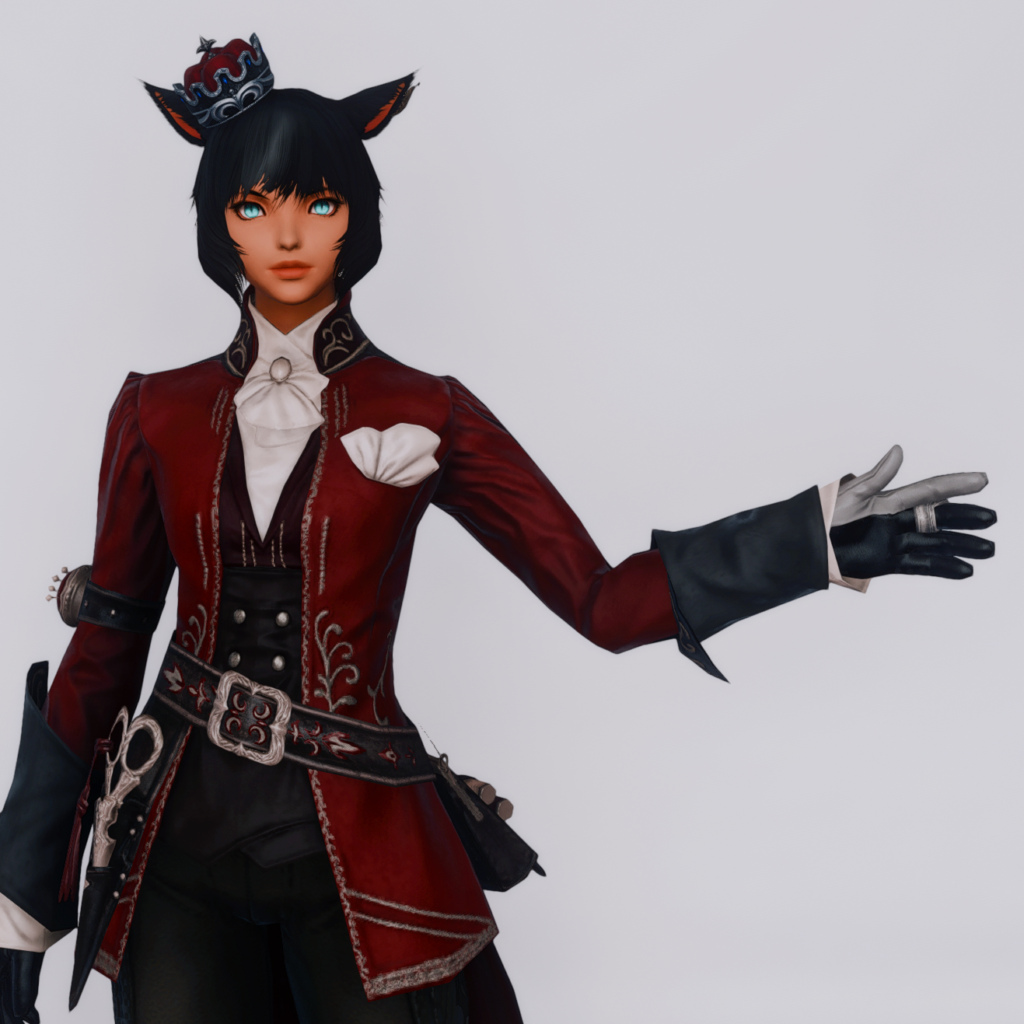
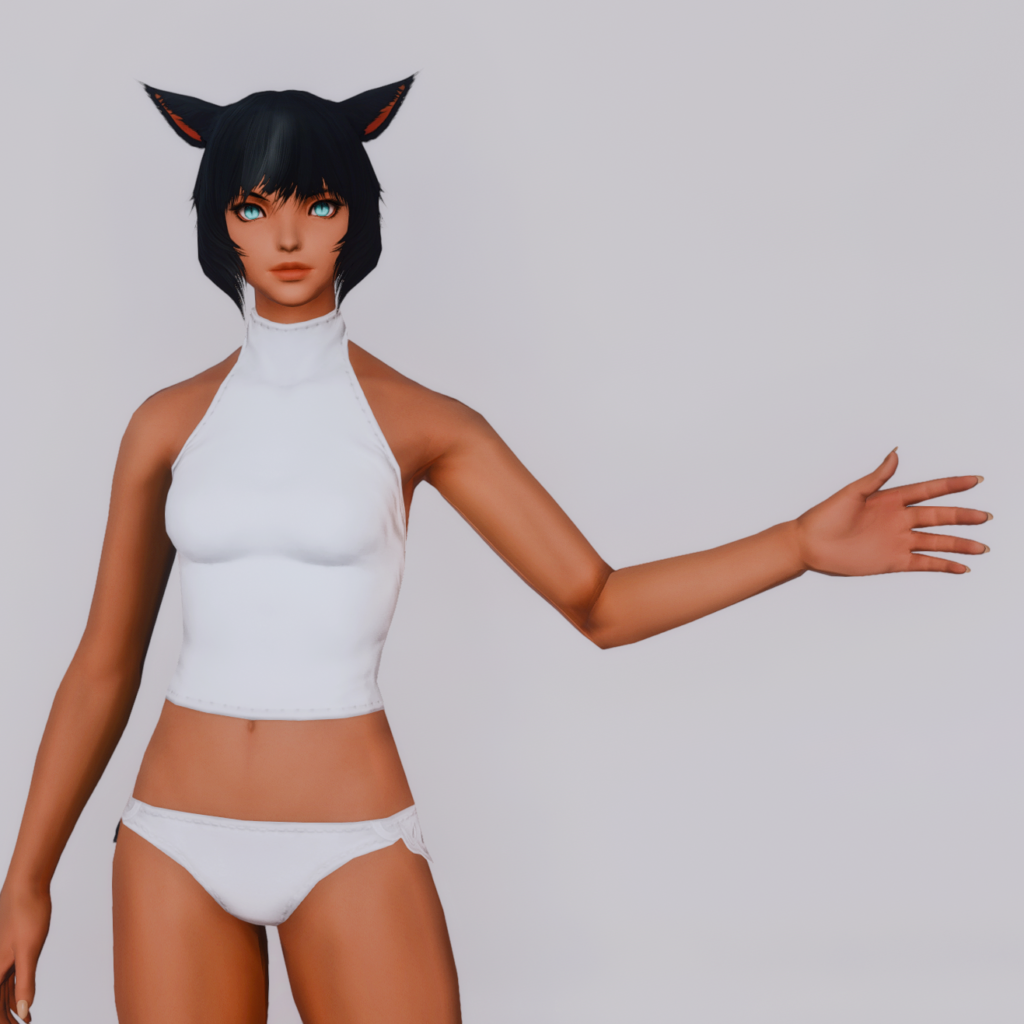
Very simply put, clothes hide mistakes. A fully dressed character won’t show you the same mistakes in a pose as a dressed down character would. Not to mention, different pieces of clothing will cover and reveal different kinds of mistakes. By using a dressed down character you can clearly see when an adjustment is causing issues.
That doesn’t mean you can’t use clothing to your advantage at times. You’re not going to be using these poses while the character is naked (well…). And if you have no intent to share or reuse this pose at a later time, there’s no reason to spend time perfecting the pose if it already looks good for your intended screenshot.
The idea here is that if you want your pose to be more universally applicable, be it for the purpose of release or future reuse, starting off with a good base will help you in the long run.
Using references
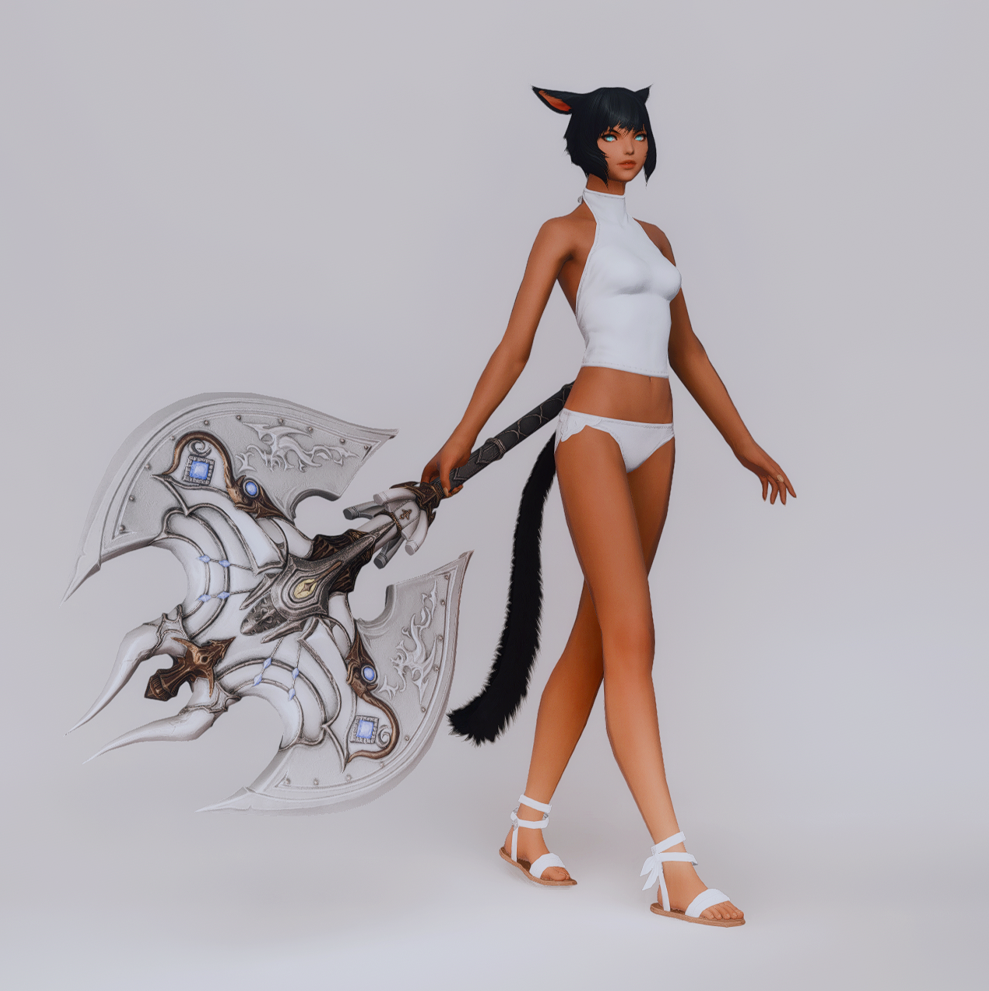
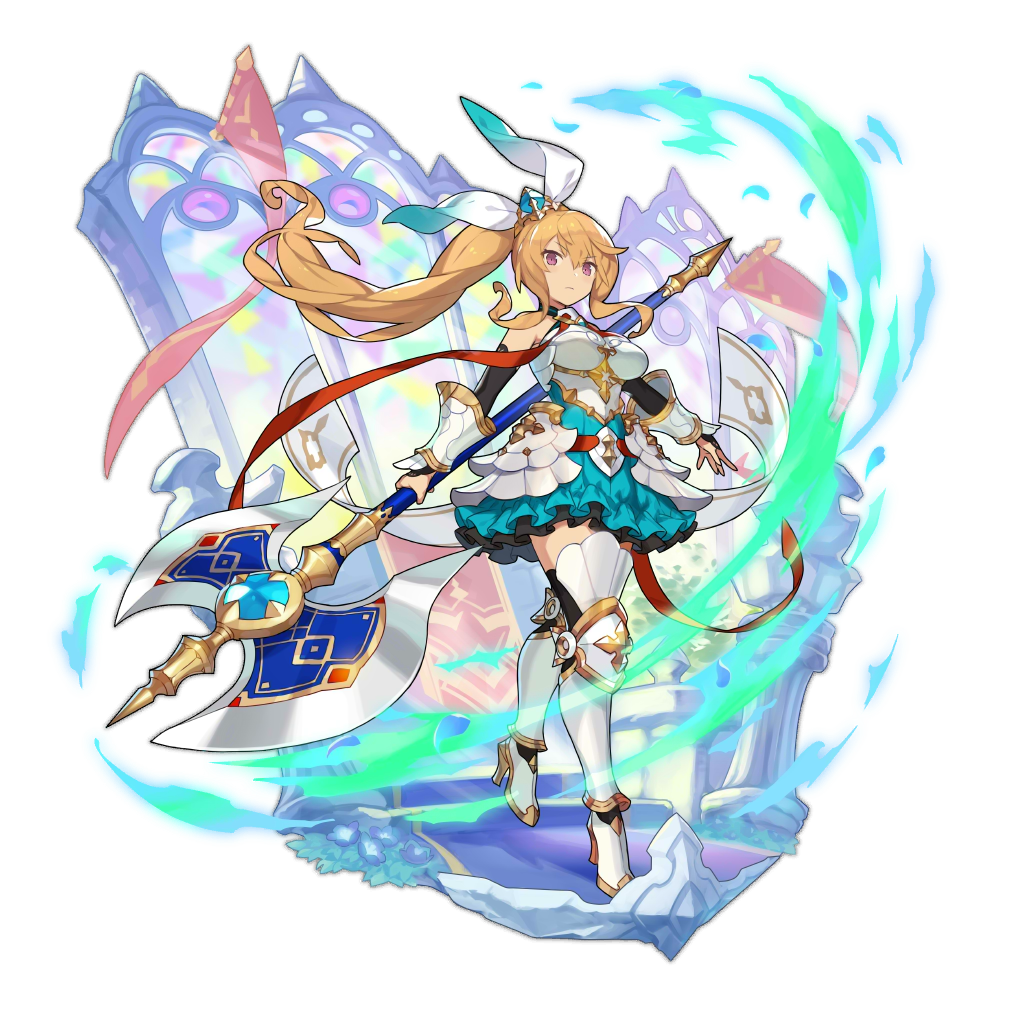
Though nobody is stopping you from sitting down and trying to figure out a pose by moving some limbs around, the best thing you can do when creating something new is looking for inspiration from outside sources.
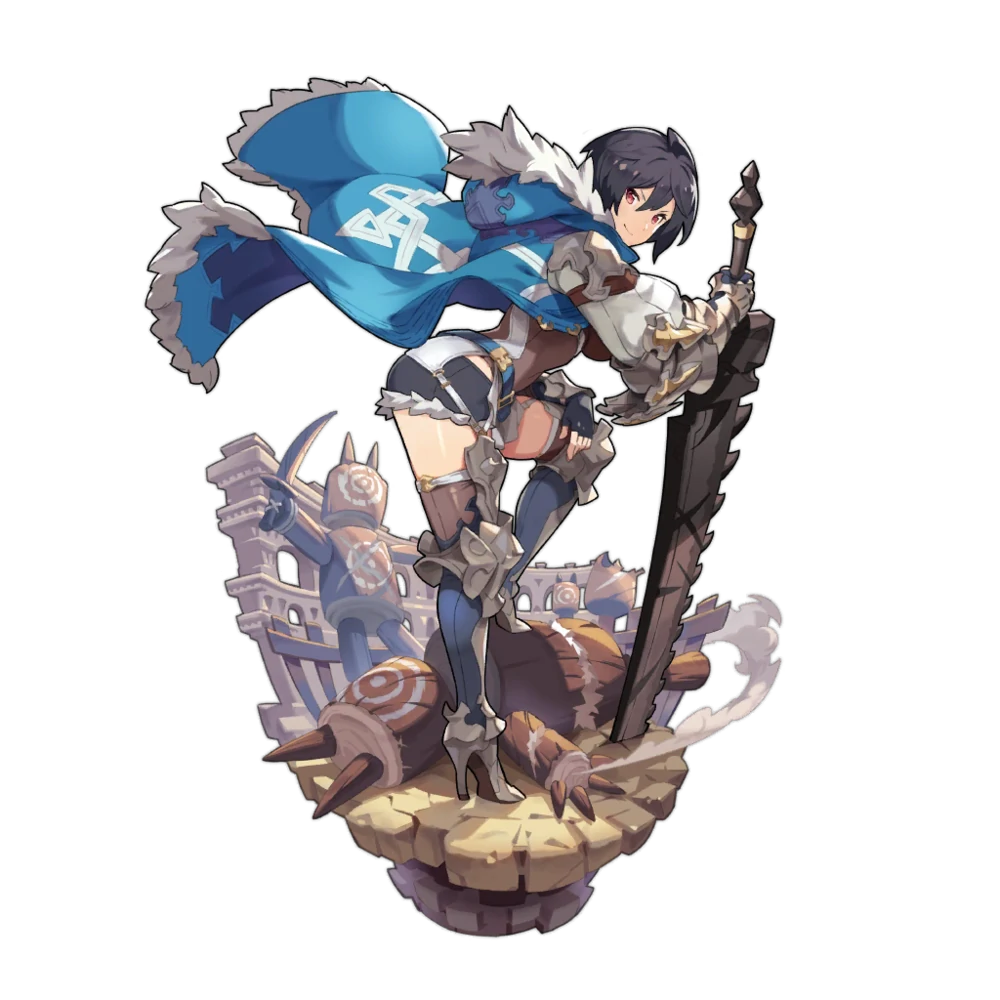
As with any art form, using references can aid you in getting a proportionally sound end result. This is why for every single pose I’ve created, you’ll be able to find a reference that looks at least somewhat similar.
Floating your reference on top
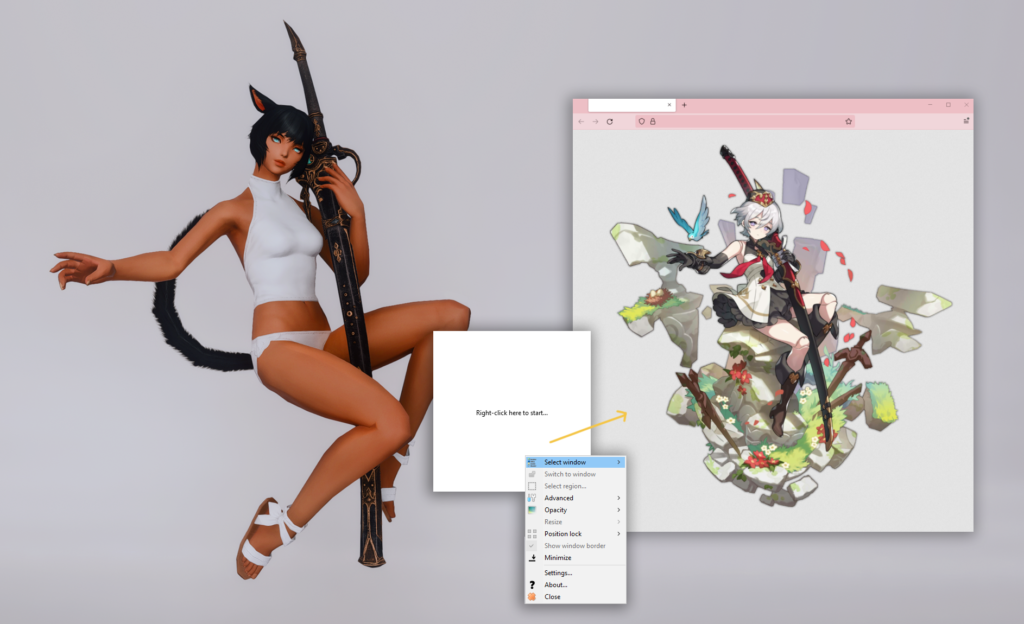
Keeping your reference in immediate view is ideal. If you have a second monitor, you won’t have any troubles doing this. You can simply wack your reference shot right onto the other screen and look at it whenever you need. However when you don’t have the luxury of a second monitor, alt tabbing back and forth will get annoyed real fast.
To solve this issue myself I use OnTopReplica, which you can download for free on GitHub. Once you’ve downloaded and installed the program, you can select and window you have open to float on top of your screen. Simply open the image you’ll be using in your browser or system’s picture viewer and select said window in the program as shown above.
A reference, not a replica
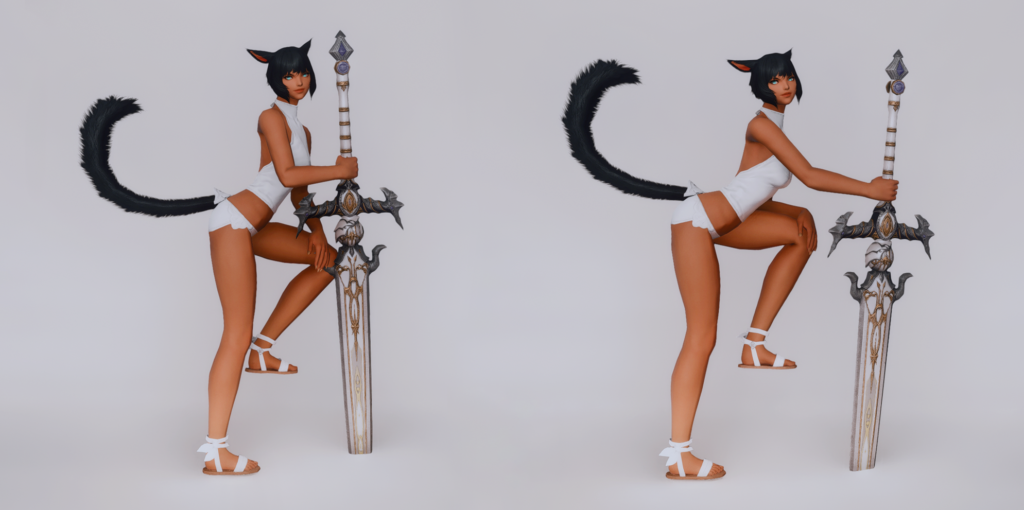
A reference is just that, a reference. The aim isn’t to create a 1:1 replica. When it comes to drawn art, there is a good chance that due stylistic choices the proportions were exaggerated. This won’t always translate well onto semi-realistic body proportions like in FFXIV.
Above you can see two versions of the same pose. While the second pose is closer to the reference, the first one is more realistic and truth be told, comfortable looking. This doesn’t mean the second pose is inherently bad, although the character’s leg is pretty far up there.
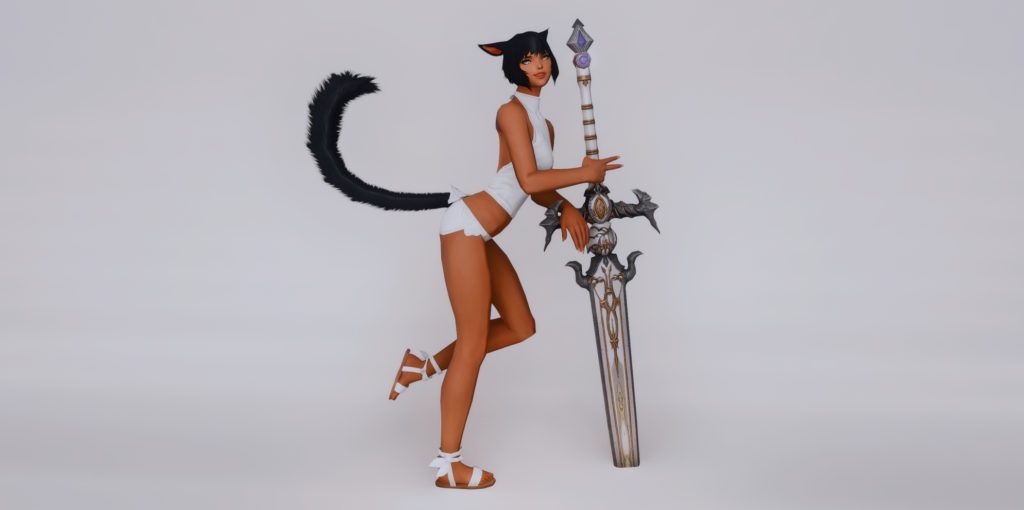
In the end I’ve opted to go into a different direction from this pose’s source. You can still see the inspiration, which means that the reference was still useful to get me started.
Your starting point
Every pose has to start somewhere. A common practice is to find an emote that is similar to what you want your final pose to be. Although there’s no need to do this for every pose, it will make the process a bit faster. More importantly, it might let you avoid a big chunk of the more tedious work ahead.
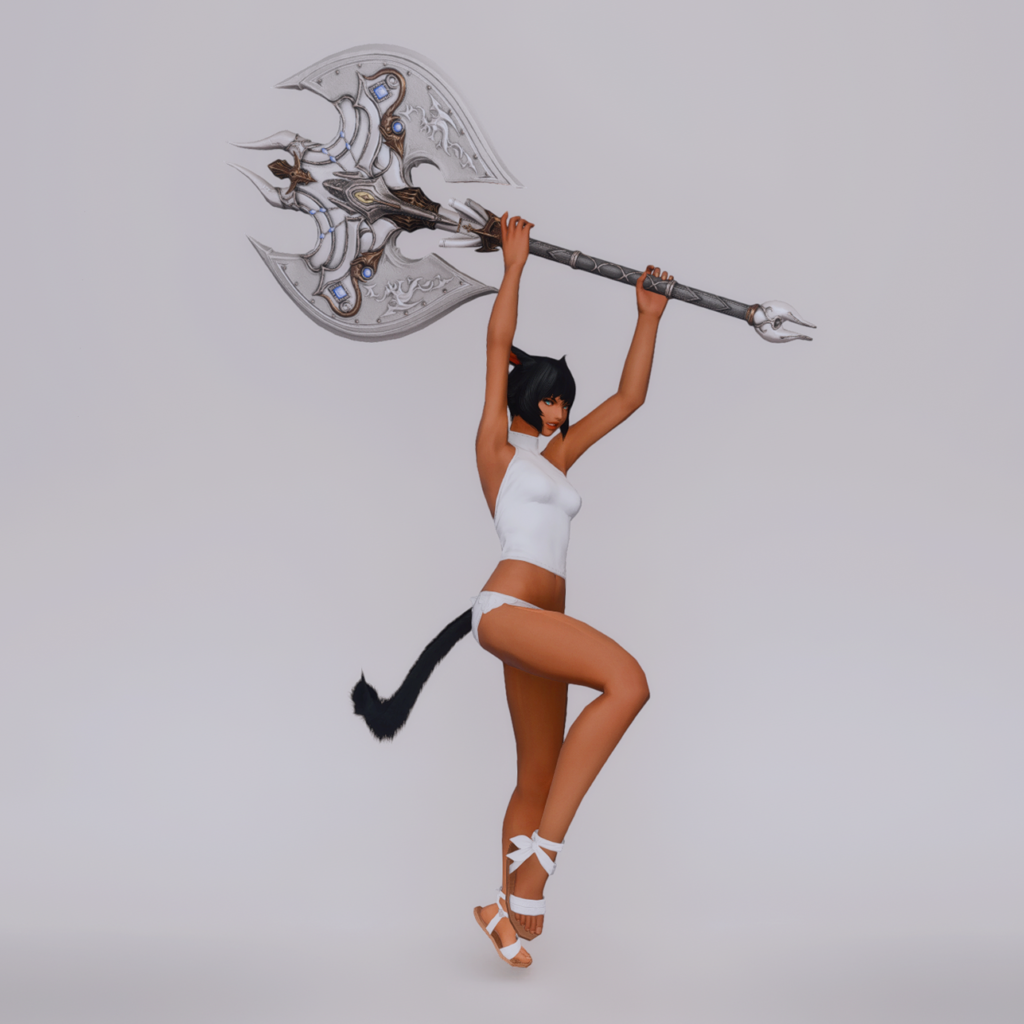
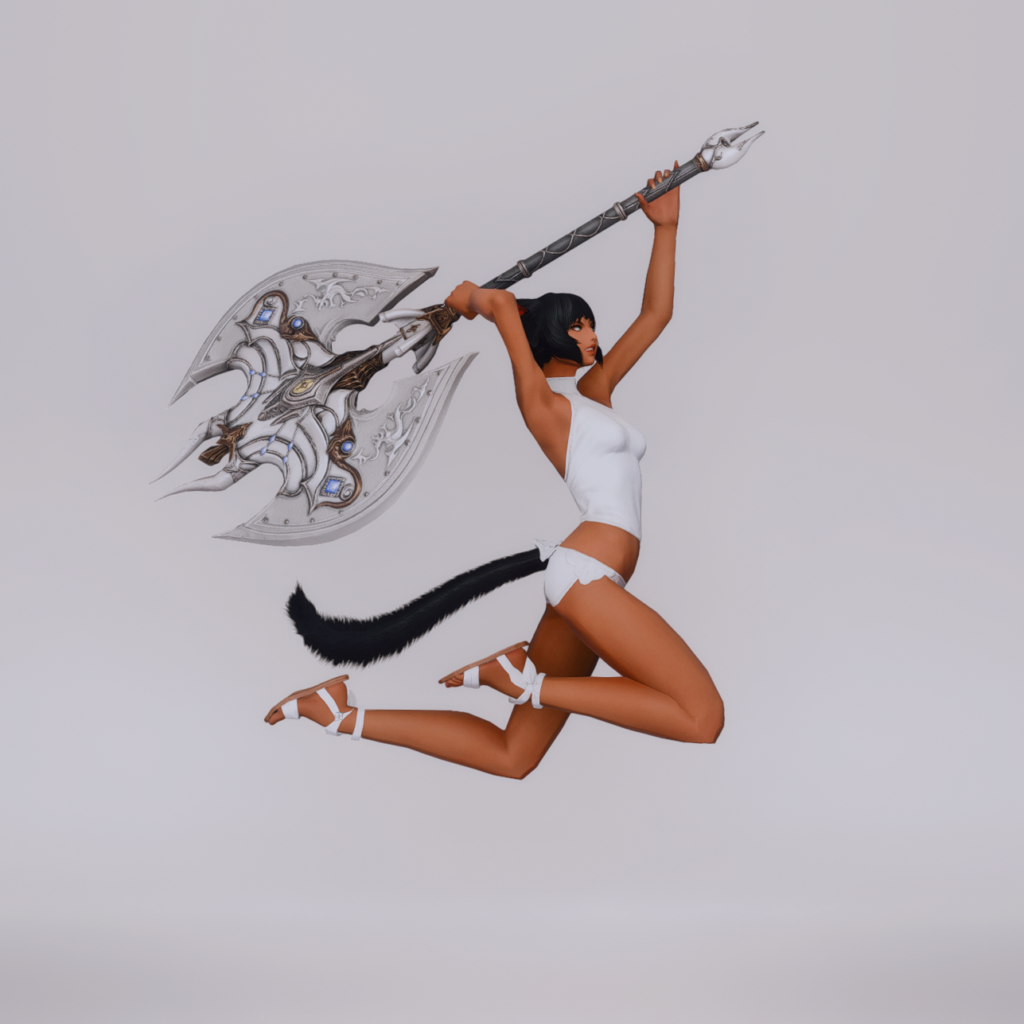
In finding an emote to use as your base I recommend focusing on the position of the arms. When it comes to posing, arms are the most finicky to get right. Elbows have a tendency to look incredibly awkward depending on how you try to rotate them.
As you can see in the images above, I’ve used the warrior’s battle stance emote to raise the character’s arms above her head. From there adjusting the arms to the right position wasn’t as much work as it would have been to try and raise the arms from a lowered position. All the other bones were no harder to adjust than they would have been in a regular idle pose either.
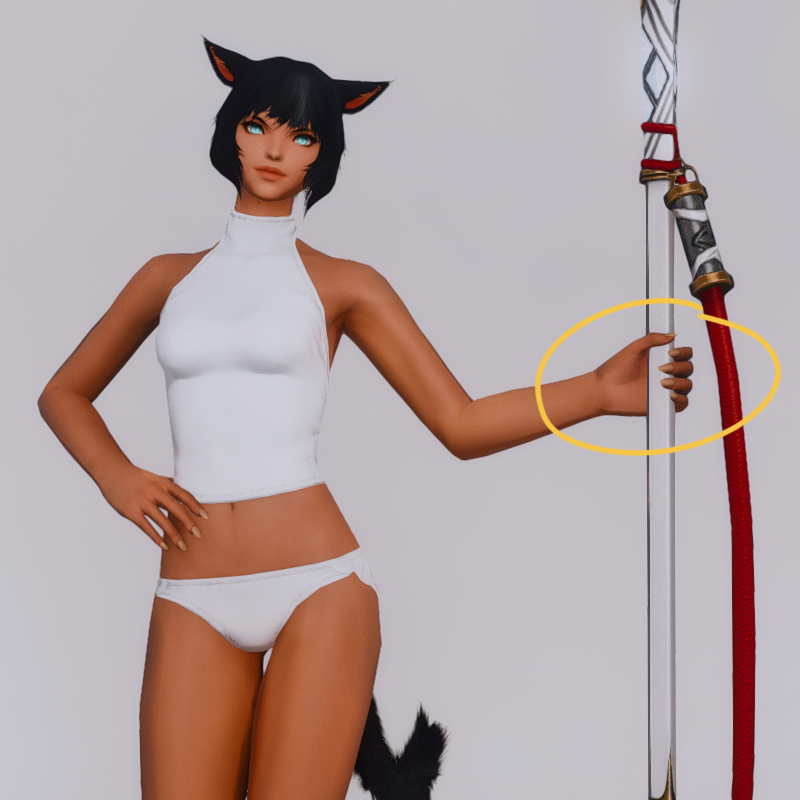
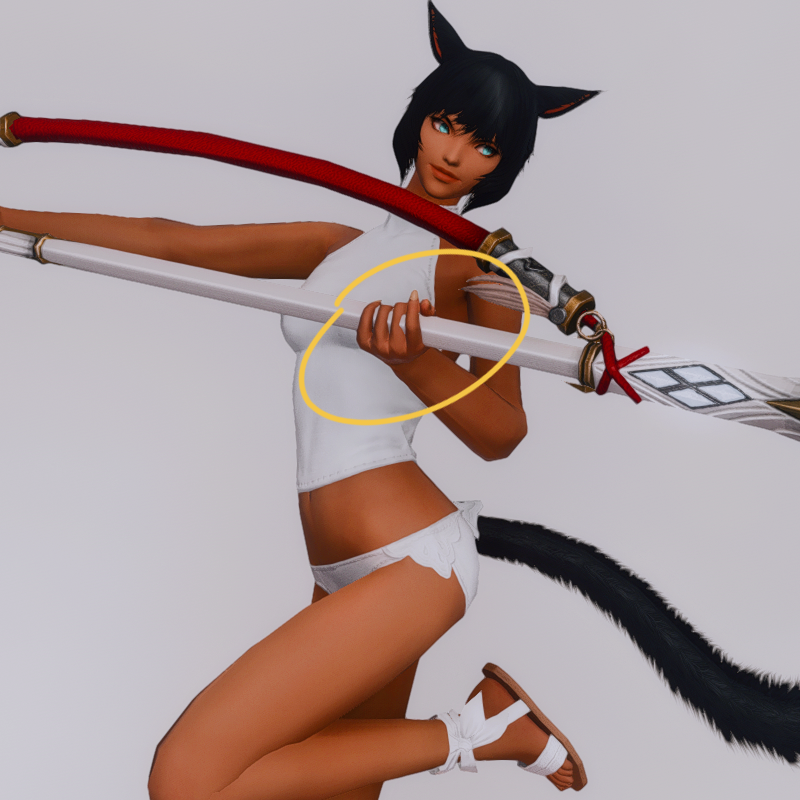
Something else to keep in mind is how your character is holding a weapon. This becomes important when you are creating a pose in which a weapon will be present. How a weapon is held in your custom pose will depend on the original animation and how said weapon was held in that. As you can see above, I started my character in the Dragoon idle pose. Her hand is only slightly away from the top. Now in the custom pose to the right you can see that this hand is holding the spear in the exact same spot.
If I were to use another battle animation where the spear were to be held differently, then this would translate into the custom pose as I load it in as well. This is why it’s useful information to provide to people using your poses, which starting pose they should use. Will the weapon look fine with any class animation? Or does it specifically have to be /vpose, /bstance or even the idle pose?
Head on over to the pose tab
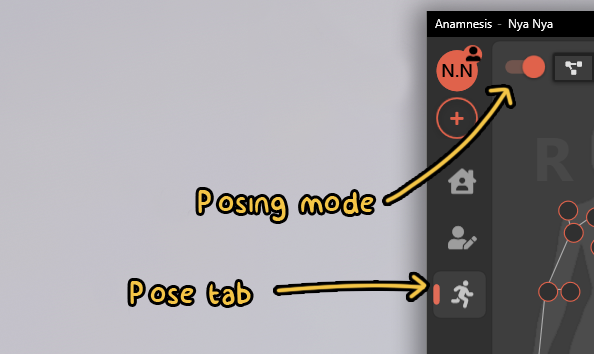
Now that you’ve got yourself a starting pose we’re about ready to start editing it. We start off by going into /gpose in game and the pose tab in Anamnesis.
You may notice that everything in the pose tab is greyed out at the moment. We’ll want to enable posing mode. Before we do this, make sure to freeze all the characters in your scene using the gpose menu. By doing this we ensure that the characters in your scene won’t be floating around weirdly as you are editing your pose.
Once you’ve done this you can toggle the switch at the top left. If you forgot to freeze your characters don’t fret, there’s no harm in doing it after you enable posing mode. We just want to make sure everything is frozen before we start editing for real.
What’s all this then?
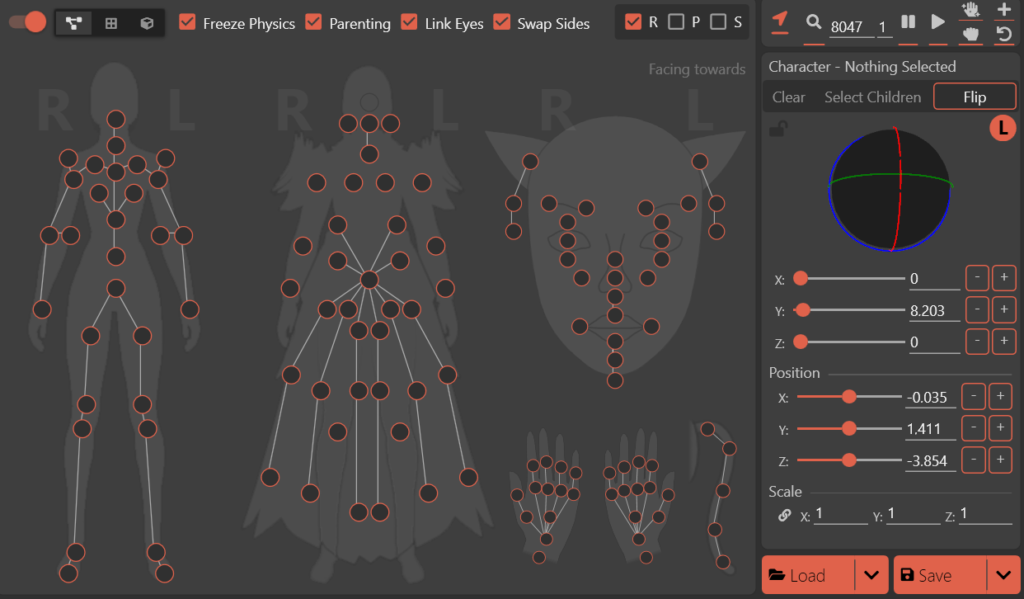
If you’ve done everything correctly you should now see the window as it is shown on the left here. This is the GUI View and is one of three options you have to view and edit your character’s pose. Aside from this view there’s also the Matrix View and 3D View. If you want to switch views you can do so by hitting one of the three icons right of the posing mode switch.
In this guide we’ll be focusing on how to use the GUI View. It’s the most user friendly experience while editing and probably the easiest way too. Though you might find yourself having a different preference down the line which is absolutely fine.
If you have a look at the window, you’ll see a bunch of red outlined circles over the top of a character silhouette. These circles are called bones. By clicking a bone, you’ll be able to edit said body part using the movement tools on the right. These being the rotate Gizmo and the first set of XYZ sliders.
What bone is that?
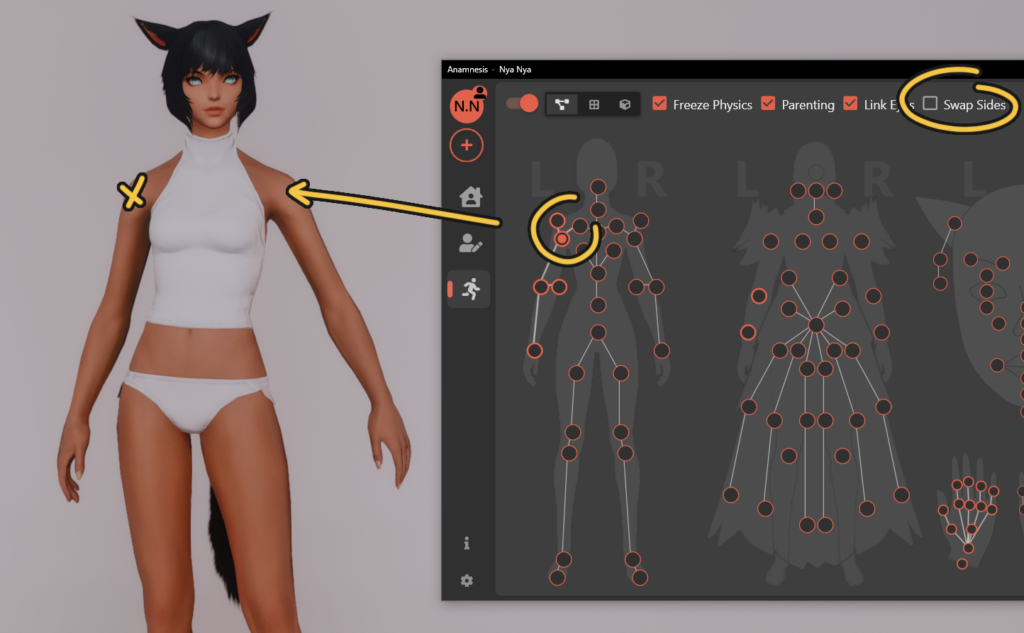

Before we have a look at the movement tools, we should have a look at the bones and what part of the body they represent on your character. You may have noticed the big L and R to the side of the character silhouette. These letters represent the left and right side of your character, in the character’s PoV.
If you look at the top of the window you’ll see a few settings that you can check or uncheck. Primarily we want to look at “Swap Sides”. With this setting turned off, when your character is facing you, the left and right side in the GUI will essentially be flipped from what you see on your character. Essentially the left shoulder bone will affect your character’s right shoulder from your PoV. For further clarification you can refer to the images above.
By checking “Swap Sides” you will make it so that when your character is facing you, the bones in the silhouette will match what your PoV of the character.
Let’s move a bone: the Rotate Gizmo & XYZ sliders
Alright! It’s finally time to move something. Select a bone you’d like to move. I’ll start off with the right arm (my PoV). If you look to the right of the window you’ll see a big orb at the top with underneath it some sliders.
The orb is called the rotate Gizmo. You can see there’s three lines around it. These represent the X, Y and Z positions of the bone.
You can click and drag these lines into a direction which, if you have selected a bone, will move said bone into that direction.
I personally like using the Gizmo because it gives me a visual representation of where my bone will be moving to. The video on the left here will show a bit more clearly what this entails. Additionally, the Gizmo is good for making larger changes quickly.
Underneath the Gizmo you can find a set of 3 sliders. These are the XYZ sliders used to move the bone similarly as with the Gizmo, just in slider form. These sliders are good for making smaller and more precise changes. That said, you can still opt to make all your changes exclusively with one or the other. In the end it’s all a personal preference.
Continue reading in part 2
We’re done with our prep and ready to actually start making a pose! You can continue reading in part 2. Alternatively if you have any questions about part 1 you can join us in our Discord. And of course, don’t forget to check out the official Anamnesis Wiki.
