Creating a pose from scratch can seem daunting, but it’s not as difficult as it might seem. This guide will walk you through my creation process using Anamnesis, and what I do to consistently get good results.
This guide covers the basics of pose making, and therefore prior knowledge with Anamnesis is not required.
Why Anamnesis?
The main difference between Anamnesis and other posing tools is that Anamnesis is a standalone program, while the others function as plugins. Because of this, Anamnesis does not require Dalamud.
In practice, the tools aren’t different enough to declare one clearly superior. It mostly comes down to preference. I find Anamnesis easier for beginners, as its interface feels more accessible to new creators.
Preparation
- Undress your character: Posing in their small clothes allows you to see broken bones much easier.
- Get a reference: Although we won’t aim to make a 1:1 replica of the reference, having one will make creating a pose significantly easier.
- OnTopReplica: If you don’t have a second monitor, using software such as OnTopReplica will allow you to put your reference over your FFXIV window.
Using Anamnesis
In order to use the posing portion of Anamnesis, you need to enter /Gpose. When in Gpose, you will want to disable motion. This will prevent your character from floating and potentially snapping back into its original position.
 The posing tab is where all posing is done


In Anamnesis, go to the ‘POSE’ tab. There, you will be able to enabling posing with the top left toggle switch (next to ‘Freeze Physics’). When done correctly, you will be able to select bones (circles) you wish to edit.

There are four different types of views. We will primarily spend most time in the GUI view, but whichever you end up choosing is your preference. Some bones might be easier to access through other views.
 GUI view


- GUI view: A character “model” overlaid with circles to represent bones.
- Face GUI view: Same as the GUI view, but focusing on facial bones.
- Matrix view: A text-based overview of all bones.
- 3D view: A three-dimensional skeleton displayed alongside a list of all bones.
Perspective
Before we adjust the pose, let’s look at the GUI. Beside the character’s silhouette you’ll see a large L and R. These indicate the character’s left and right sides from their point of view.
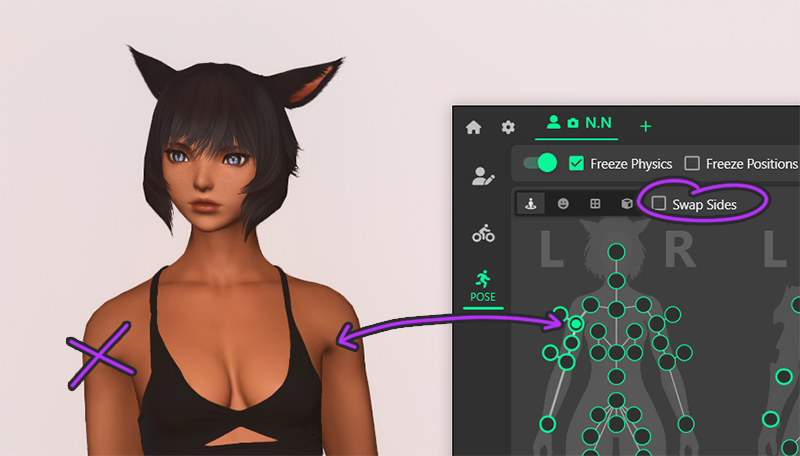
Without “Swap Sides” enabled, the left shoulder bone in the GUI represents the right shoulder (our PoV).
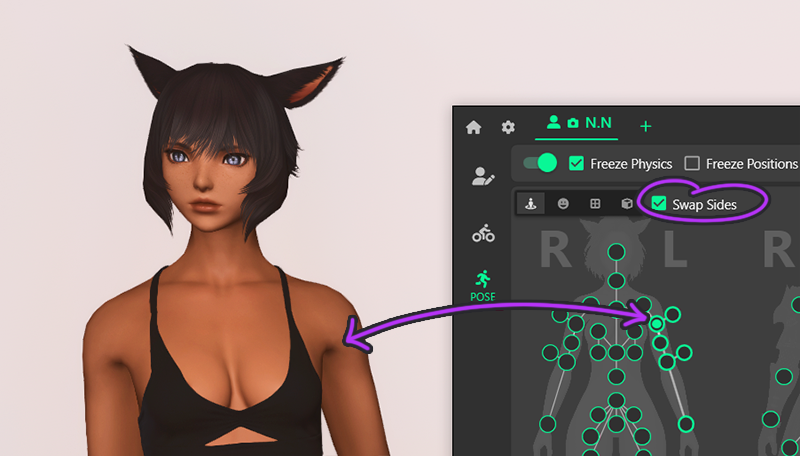
With “Swap Sides” enabled, the left shoulder bone in the GUI represents the left shoulder (our PoV).
Next to the view buttons is the “Swap Sides” checkbox. If you leave it unchecked, a character facing you will have their left and right sides reversed in the GUI compared with what you see on the model.
Although it comes down to preference, I recommend enabling this option so the GUI model matches your own point of view.
Moving bones
The circles visible on our model are referred to as bones. Bones are points of the body that can bend.
By selecting any of the circles, we let Anamnesis know that this will be the bone that we’ll be adjusting.
Gizmo
Sliders
Adjusting bone positions is done through rotation. You have two tools for this: the Rotate Gizmo and the coordinate sliders. When you move the Gizmo lines or the sliders, the selected bone rotates in that direction. If nothing is selected, the entire character rotates instead.
Both tools produce the same results, so which one you use is up to you. I prefer the Gizmo for broader movements and the sliders for finer adjustments.
Creating a pose
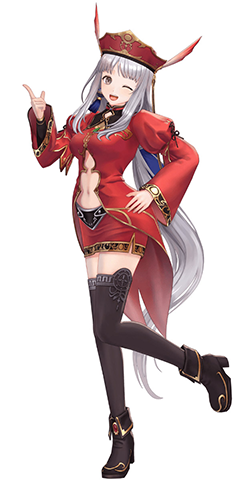
To make posing easier, I start by seeing which parts I can match with existing emotes.
In this case, using the joy emote together with the wink expression gets me almost halfway to the final pose.
Bulk movements
I begin with the largest adjustments, starting at the top and working my way down. To avoid unnatural or broken bones (literally), each movement should involve several bones with the same body part.
Moving only one bone
Moving several bones
For example, when moving the left arm, you shouldn’t rotate only the arm bone. Adjusting the clavicle and shoulder as well creates a far more natural result. Just as multiple muscles work together when a real person raises their arm, several bones in the character should move together to mimic that effect.
Finer details
Once the limbs are in place, I focus on finer details. Your character and the reference most likely won’t share their proportion on a 1:1 scale. As such, I let go of the reference just a little and focus on what looks good in relation to my character model, rather than replicating what I see exactly.
At this point you should be rotating your character or moving your camera around them a lot. While your reference might have been 2-dimensional, your character most definitely is 3-dimensional, therefore we want to be sure that the adjustments we make look good at all angles.
Weight distribution
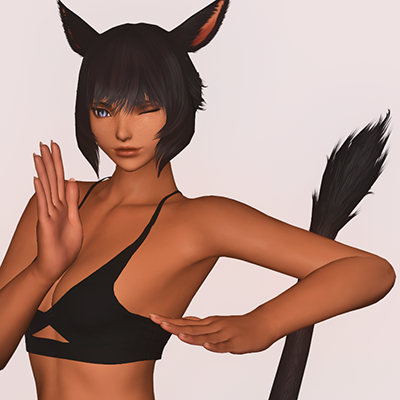
More often than not, I catch myself placing too much weight on one side of a character. If I did that in real life, I would almost certainly end up on my face. When I create a pose, I ask myself a simple question: would the character fall over?
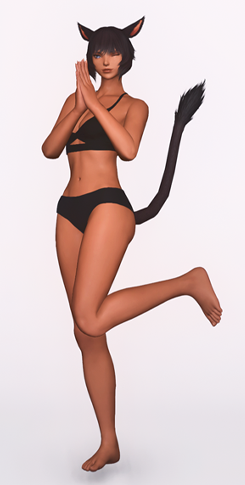
The pose shown previously doesn’t have any immediately concerns when it comes to balance, so we’ll take another pose as an example.
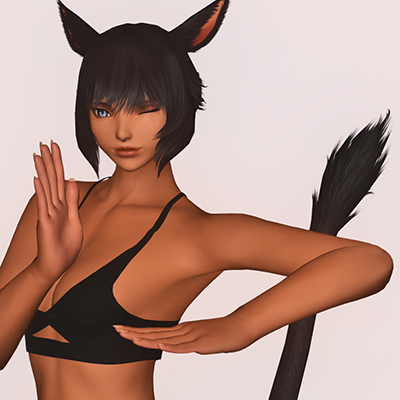
Not all poses have to be perfectly balanced with two feet on the ground. Motion is a good reason as to why a leg may be up, or the character as a whole might be leaning. This pose however, makes no sense. Even if the character is in motion, the motion has to be somewhat logical. In a realistic scenario, the character would fall over.

This pose makes no sense. Even if the character is in motion, the motion is illogical and in a realistic situation the character would fall over. That’s not to say that all poses need to be perfectly balanced with two feet on the ground, motion is a good reason
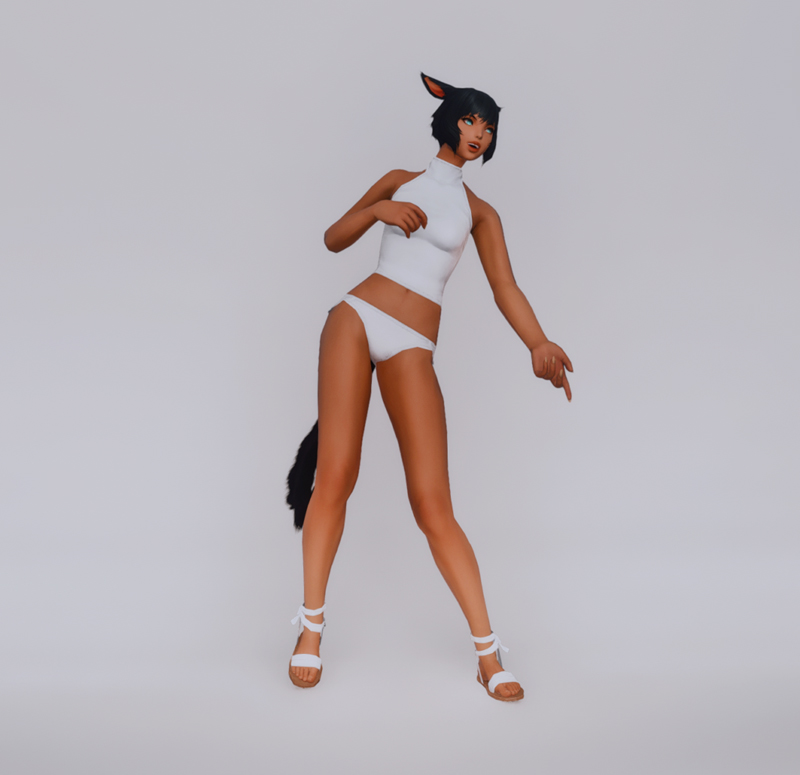
Luckily it’s no problem to balance the pose. Simply move the leg in a way that will support the body properly.
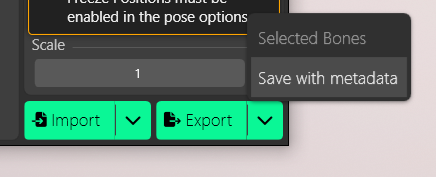
Saving a pose
Once you’re satisfied with your pose, you can save it. Go to the Export button in the bottom-right corner, then click the small arrow beside it. This opens a submenu with two options.

Choose “Save with metadata.” You’ll be asked to name your file, and then a small window will appear.
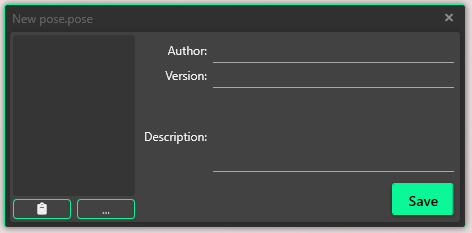
In this window, you can add useful information about your pose, such as the creator, the version, and any notes like which animation to start with before loading the pose.
Most importantly, this is where you can add a preview image.
You can add an image in two ways: by pasting one from your clipboard or by browsing for a file on your PC.
I find the most time efficient way is to paste an image from my clipboard using the Snipping Tool. The Snipping Tool lets you capture a selected part of your screen and comes pre-installed on most modern versions of Windows. If you do not have it, you can download it for free from the Microsoft Store.
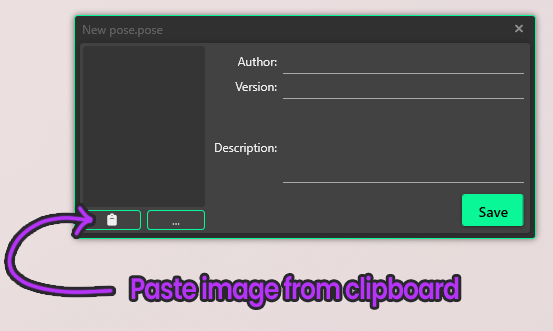
I use Windows key + shift + S to enable the Snipping Tool and select the part of the screen showing the pose. This adds the screenshot to my clipboard, and I can then paste it into the metadata window using the button shown above.
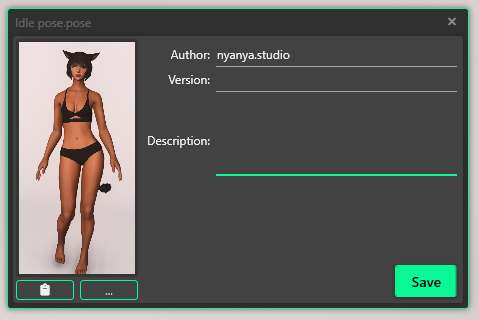
After adding all the information I deem necessary, I click Save. Now, when the pose is loaded in either Anamnesis or Brio, I—or anyone else—will see a preview before loading it.
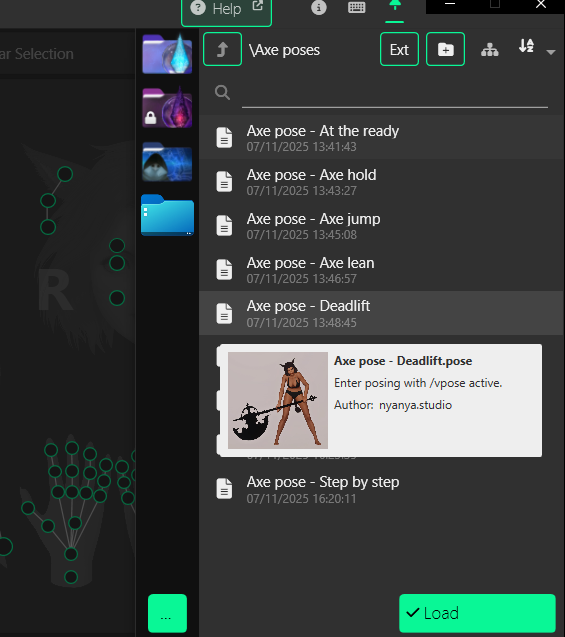
To view the metadata in Anamnesis during import, simply hover over the pose file.
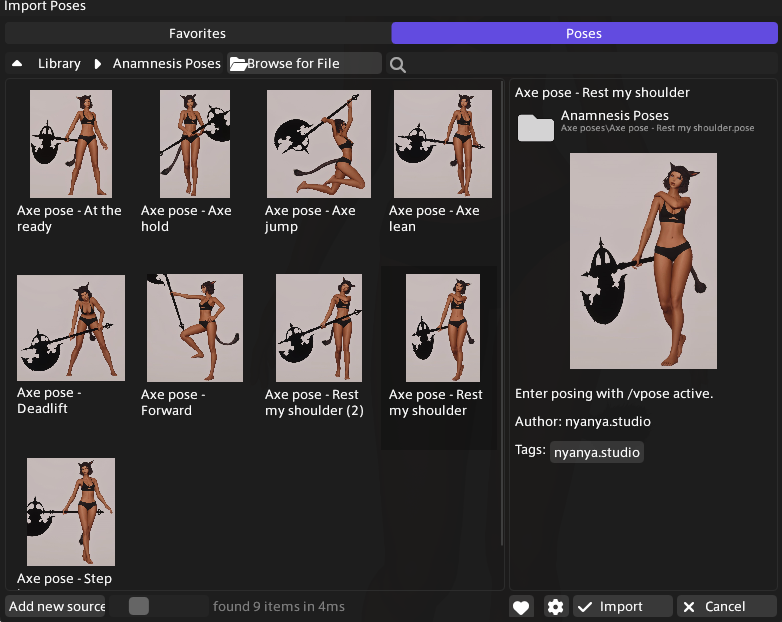
In Brio, the preview image appears automatically in the file browser, and clicking the pose reveals the rest of the information.
Ktisis sadly does not have an option to view metadata as of right now.