Setting Photoshop up for screenshots
Before we get started
I’ll say from the get go, this guide is pretty cut and dry. It’s focused on optimizing Photoshop for editing large images, making it run better and perhaps making it a little more user friendly for beginners.
If you’re not interested in using Photoshop, I have listed out tools and options that I use. Adobe software isn’t the end all and just because I was indoctrinated in college doesn’t mean you have to be.
Majority of even the most basic photo editing tools will have options for nearly everything I listed. The only one you might not find in all software is content aware fill, however I’d say this tool is a personal preference of mine rather than a must have.
What I look for in editing software
- Cropping & resizing tools
- Colour editing options
- Editing filters (Blurs & Sharpens)
- Basic brush tool
- Content aware fill
- Highlighting tool
- Grids & guidelines
Setting up Photoshop
Photoshop can eye a bit intimidating when you’ve never used it before. There’s a whole lot of buttons that will do something you like, and countless more that you’ll never use. For this reason our first goal is to set up our interface to include only what we need. This will simplify using the software tremendously.
When you first open Photoshop and open up a new file or an image on your device, you’ll be met with a lot of windows and functions you might have no idea about what they are. You’ll be able to freely adjust your UI, meaning that anything you don’t need you can simply remove. Less clutter on your screen means less confusion.
I’m going to keep it bare bones for now, which you’ll be able to follow in the video above. An essential is the layers window. I keep it big and out there. Underneath it I stick the adjustments window. You’ll see me removing the properties window. You can choose to keep it around, but I don’t really use it all that much. Aside from that, I attach the history, character and paragraph windows in a smaller menu since they won’t be used as much. Realistically, in any of these guides you won’t be using character or paragraph. It’s just useful to have around if you ever choose to add text to your pictures. The history window is a quick tool used to go back a lot of steps or to see the steps you’ve taken so far.
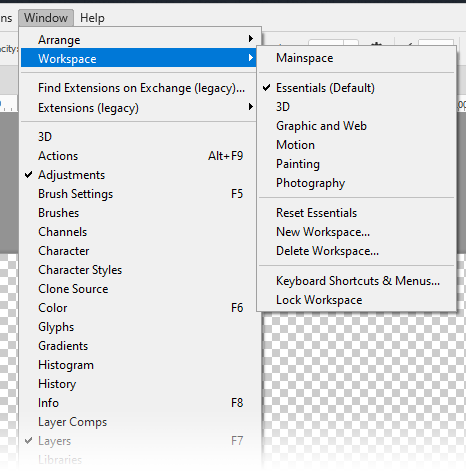
If you ever lose a window or decide you want to add one, you can find them in the top menu “Window”. Here you can also save your current workspace in case you’d like to reload it someday. Like I said before, I’m keeping it bare bones to have this be a little more beginner friendly. I highly recommend you have a look around and see if there’s anything you find useful that you’d like to add to your own interface.
Preferences
Now that the user interface is all set-up, let’s talk about our preferences. You can find the preferences window by hitting CTRL/CMND + K or if you navigate to Edit on the top menu and look at the bottom of the dropdown. We’re going to blitz through here real quick since it’s just a little bit of optimization. We’re just setting up Photoshop to work a little bit better.
Interface
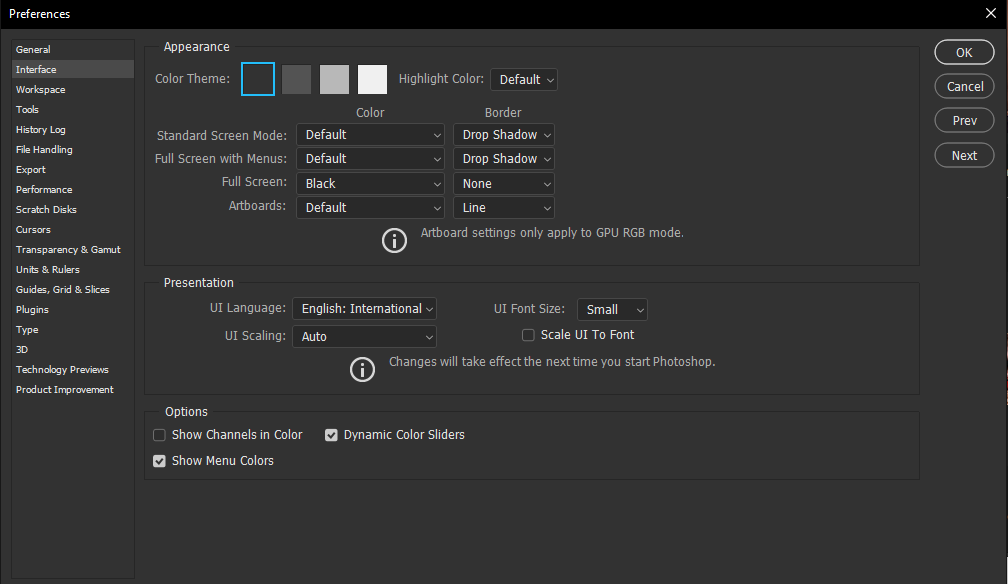
This is personal preference. Here you can choose what colour theme you want for Photoshop.
File handling
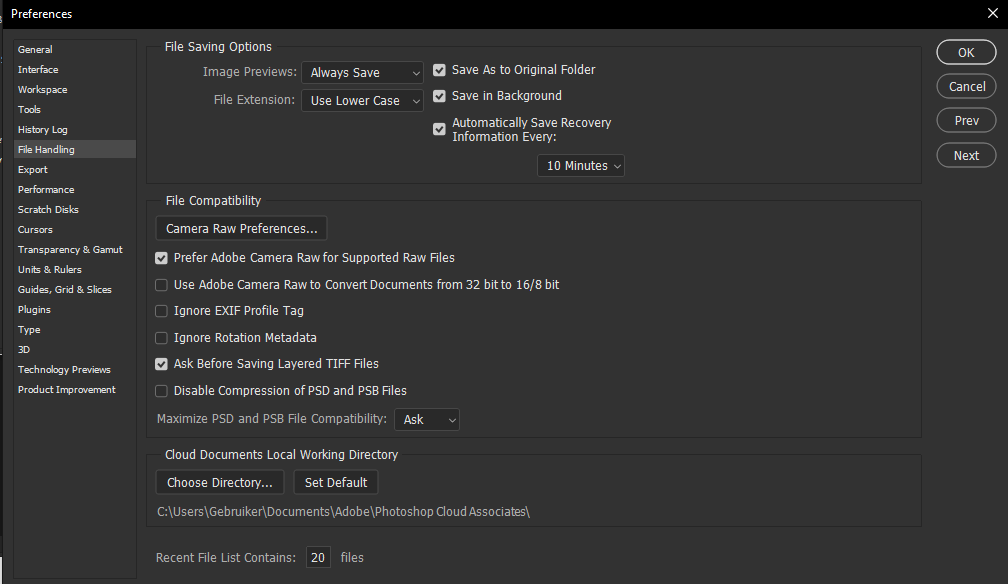
At the top, we want to make sure that “Automatically Save Recovery Information Every: 10 minutes” is checked. Photoshop crashes from time to time. This will ensure that we don’t lose all our progress. Every 10 minutes is plenty. You don’t want to slow down your PC for the sake of constant auto-saving.
Performance
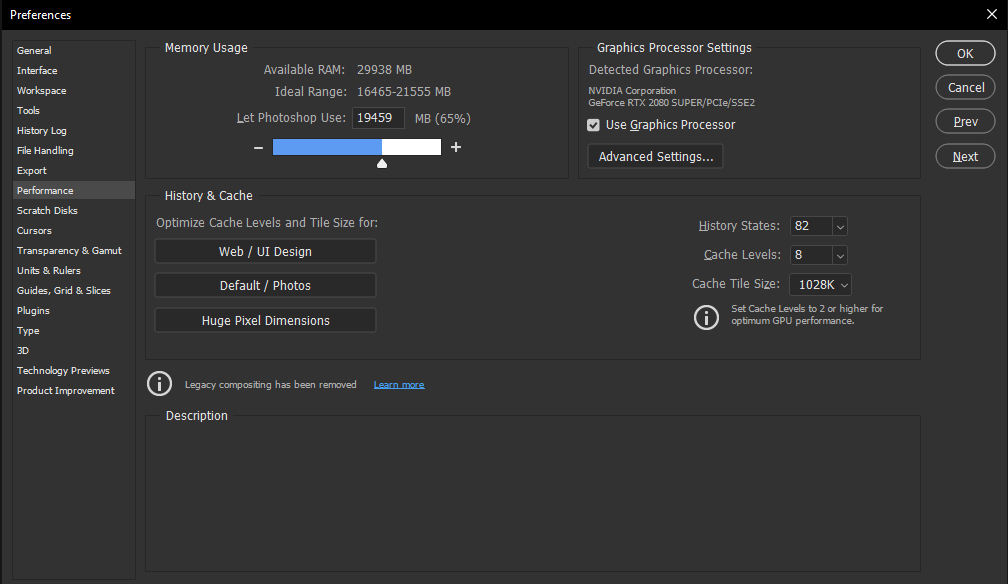
Here we can boost Photoshop’s performance a little. Before you go crazy and max everything out, let’s go over our options.
Firstly, we can increase the amount of RAM memory Photoshop uses. Photoshop is a software that uses your PC’s processing power primarily. That doesn’t mean you should give it all the processing power you have available. Other software like your internet browser, discord or whatever else you are running need to be able to tap into this as well. Increase this only if you have RAM to spare.
Photoshop will also allow you to use your GPU to improve performance. Unless your GPU isn’t supported, I would check this.
Finally, looking at history states. Think of history states as the amount of times you can hit CTRL + Z before it forgets what it’s done. Does this mean you need to boost it up to max? No. You shouldn’t be making that many steps and it decreases PS’ performance. Set it to a comfortable range (about 100 is fine).
Cache levels and Cache Tile Size we’re going to set to max because we’re working with large images and fewer layers.
Scratch disks
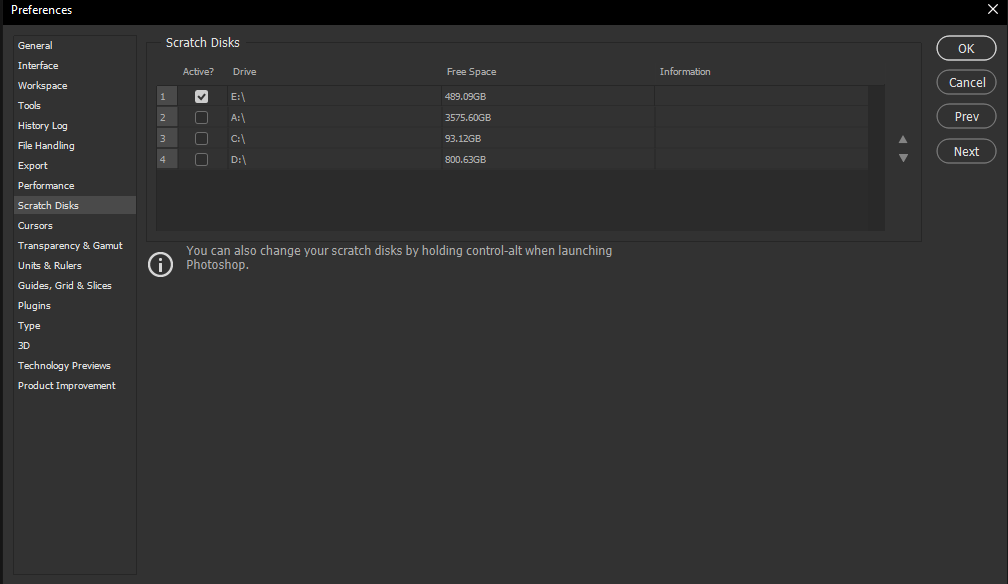
Photoshop creates temporary files. These files are big. If you let Photoshop save these files to a hard drive with maybe 100GB of space, you’ll run out of Scratch Disk space. This will result in an error, a filled up hard drive and the inability to use Photoshop until you fix it.
Simply check a hard drive that has enough space to support these files to prevent this from happening (or to fix it when it already has).
Units and rulers
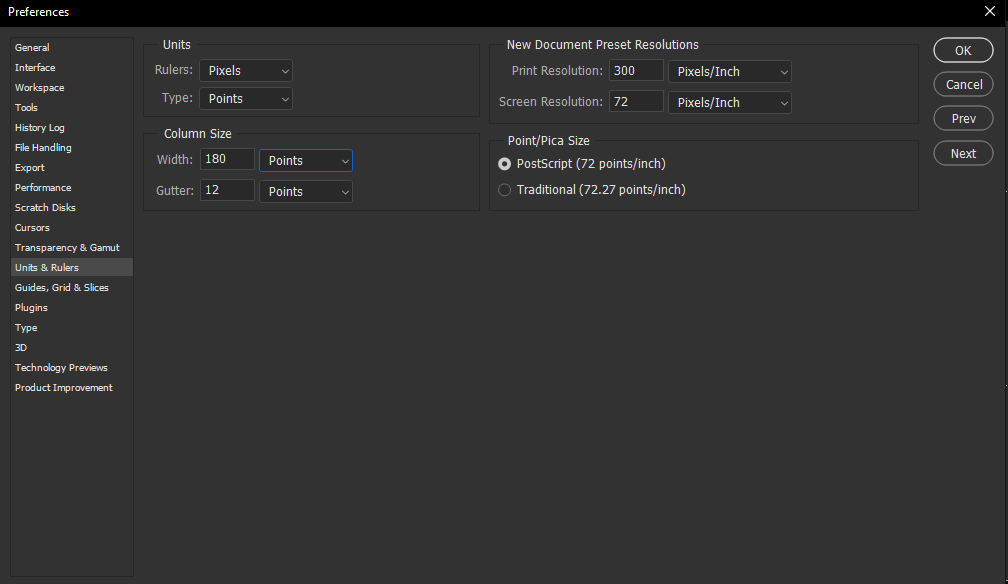
We’re editing photographs to be displayed on screens. Screens use pixels. For convenience sake we’re going to change everything to pixels or points accordingly in this tab.
Guides, Grids & Slices
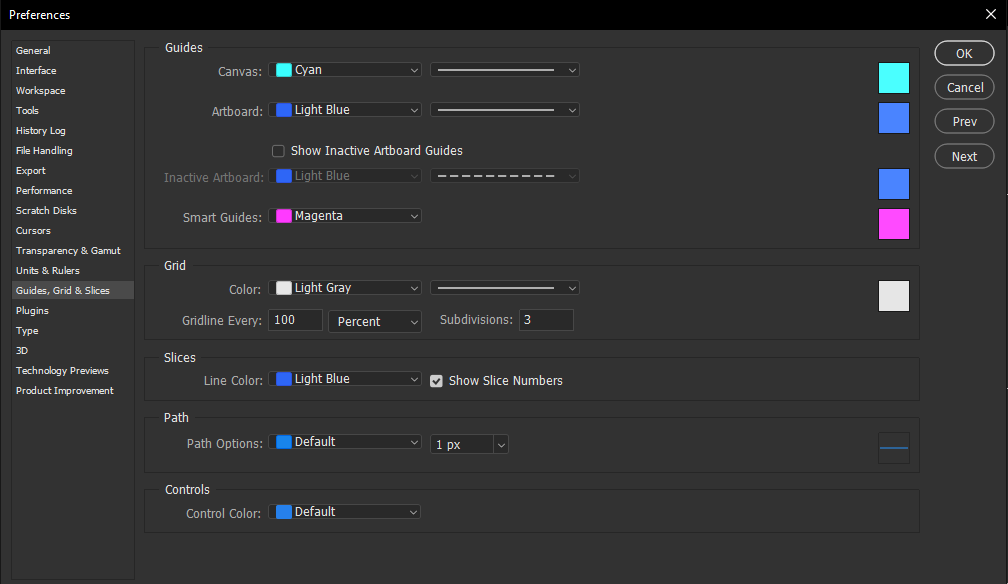
I’m going to bring this up again in the composition guide, but we might as well set this up as we’re here. We want to set up a grid that gives us rule of thirds guidelines.
Under “Grid”, set up “Gridlines” as every “100 percent” and set “Subdivisions” to “3”. Above these options you can choose a colour and line you prefer, but we won’t worry about this until later.
That’s all!
If you find yourself left with questions, you can join us in our Discord where we have a wonderful community ready to help!