There’s much to explore when it comes to lighting in Gpose. This guide will cover the tools at your disposal and how to use them effectively—let’s dive in!
Full Screen Mode Gamma Correction
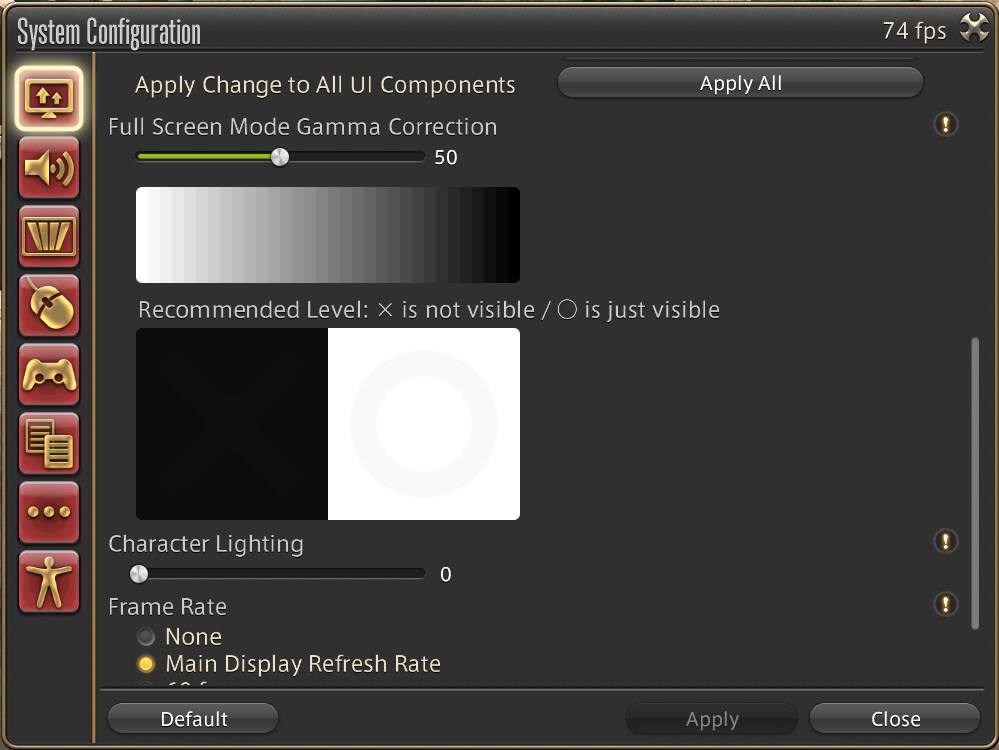
Before diving into /Gpose and its lighting options, there’s one setting worth mentioning that isn’t found in the Gpose menu. In the first tab of System Configuration, you’ll find Full Screen Gamma Correction.
To clarify—you won’t need to adjust this often (or ever). Gamma Correction exists in most games to match brightness levels to your monitor, since every display is different. It’s meant for gameplay, not photography, though it does affect how your screenshots appear.
There’s no “best” value to recommend; I mention it only so you know it’s there. If your screenshots look too dark or too bright (especially on other people’s screens), this setting might be worth checking out.
Manual brightness adjustments
With that out of the way, let’s step into /Gpose and explore what it offers. First up is the Manual Brightness Adjustment slider. Think of this as your exposure control—it brightens or darkens the entire image.
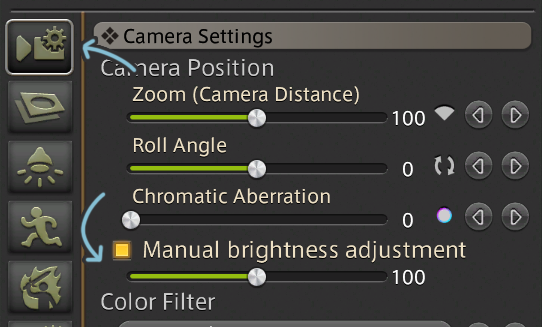
The slider’s values range from 0 to 200, but its effect depends on your environment. Time of day, weather, and location all influence how each value changes the scene. For instance, in Rhalgr’s Reach at 1 PM Eorzean Time with Fog weather, my default—the value that changes nothing—is around 70. Change the weather or time, and that number changes.
It helps to find the value that best matches the natural lighting before adding or removing light. Adjusting within ± 10-50 usually keeps you safe from over- or underexposing.
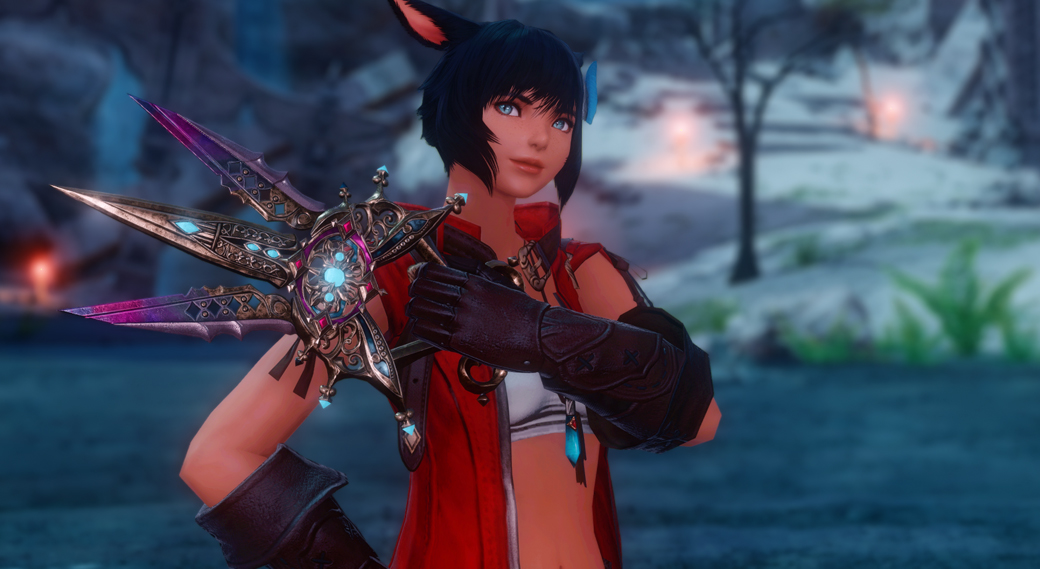
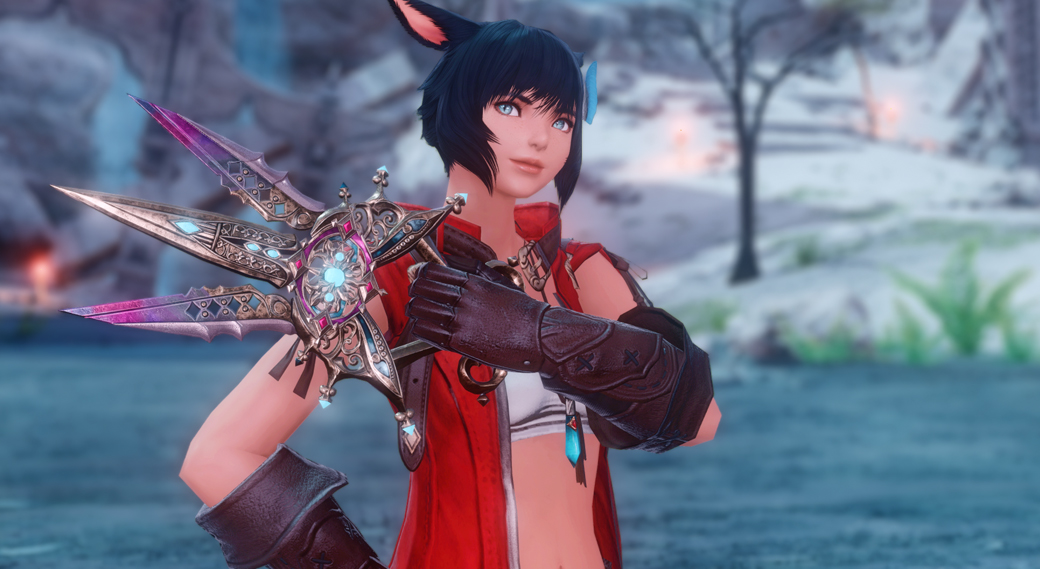
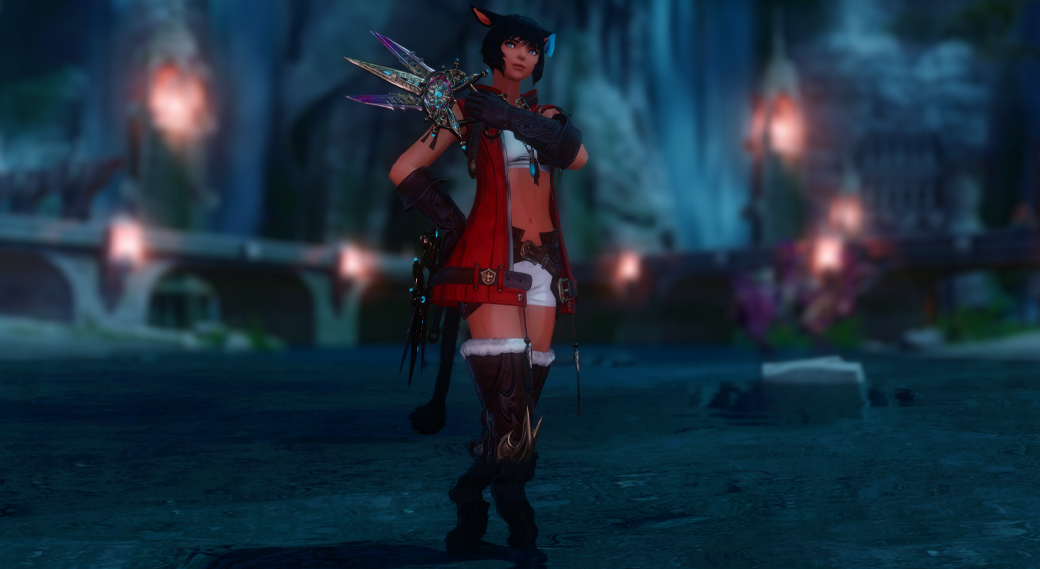
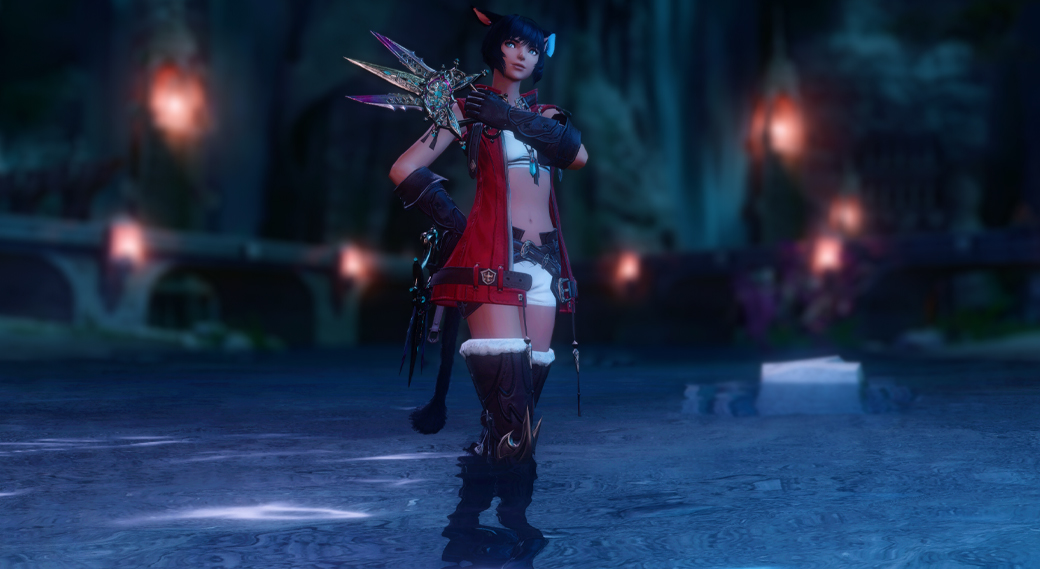
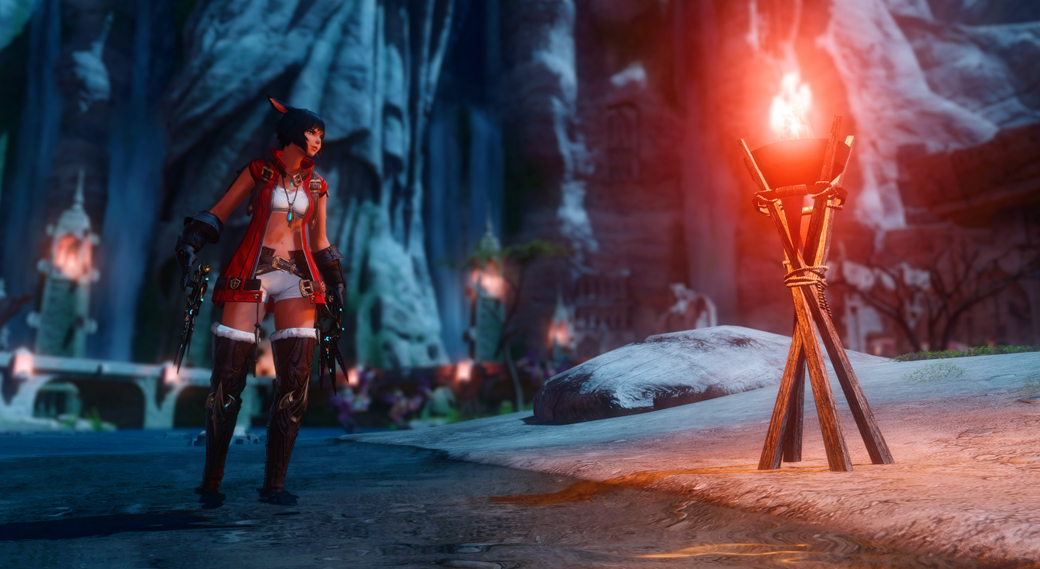
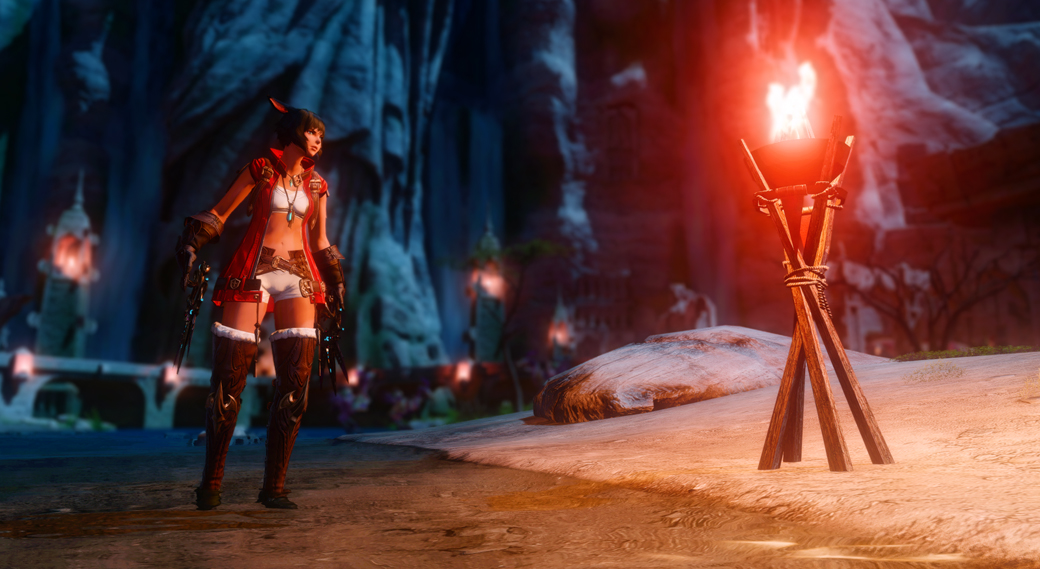
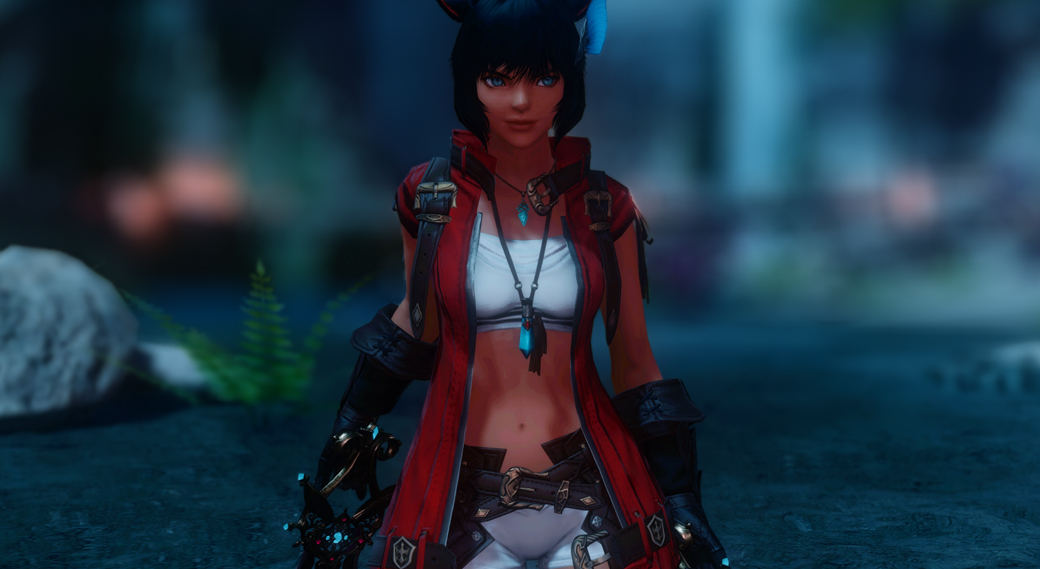
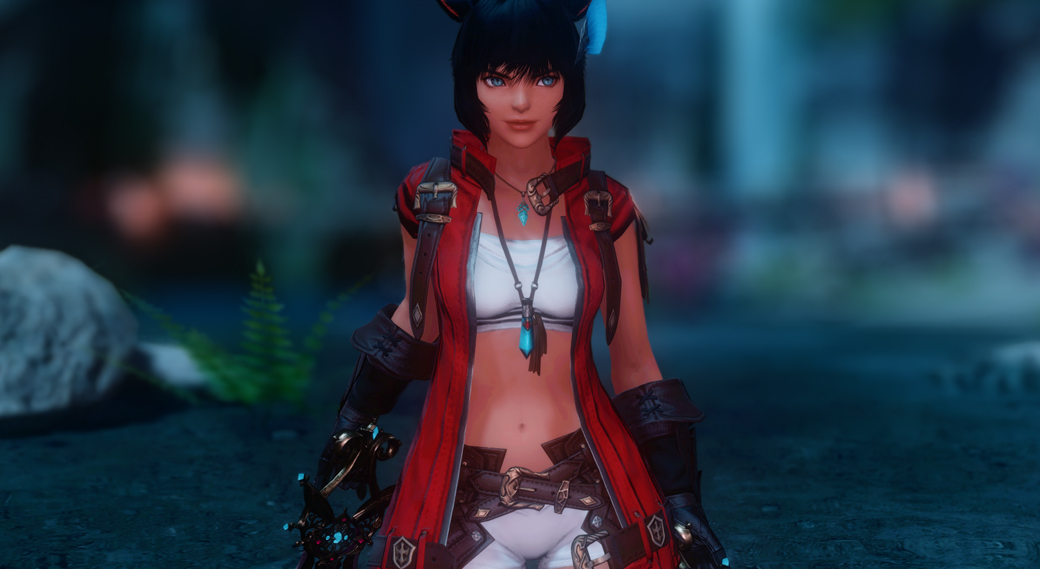
On the left we see no adjustments made. It’s a tad dark, but not inherently bad. Then on the right, we have the slider at 100. It looks good, but it no longer looks like the picture was taken at night.
Since this slider affects the entire image, using it too heavily can make parts of your shot unclear and throw off the lighting balance. It works best for subtle tweaks, lifting a dim scene or toning down an overexposed one.
Keep in mind that too much added or reduced brightness can also shift the apparent time of day. That’s not necessarily bad—you can even use it deliberately to create a different mood—but it’s worth being aware of it if you’re aiming for a specific look.
The following sentiment you’ll see more throughout this guide: every tool or setting works best in combination with others. The brightness slider is powerful on its own, but even more effective when paired with the others.
Limb darkening
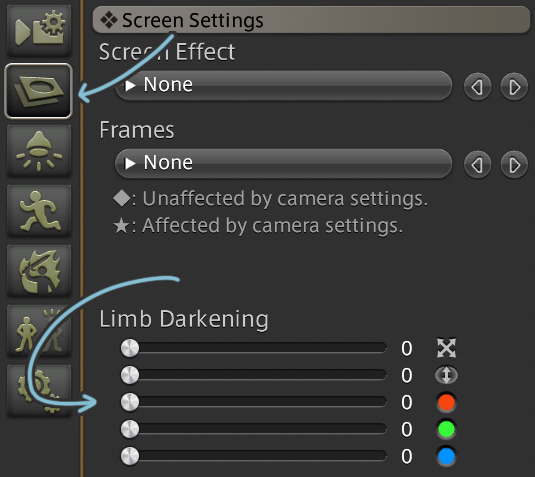
Limb Darkening is not a lighting setting, and I don’t necessarily recommend you use it as one. It simply adds a vignette around the edges of your screen, with adjustable intensity. I include it here because a subtle vignette can help darken or brighten a scene, though control is limited. Think of it as a “try it and see” option: if it works, great; if not, move on.
The sliders are simple enough. The first controls intensity and size. When using it to adjust lighting, you’ll rarely need to go above 1 or 2. The second controls shape: set it to 0 for a vertical oval, 10 for a horizontal one, and 5 for a circle.
The last three sliders determine the vignette’s colour. We’ll explore colour combinations later, but for now, remember: 0/0/0 gives black, and 10/10/10 gives white.
Lighting Settings
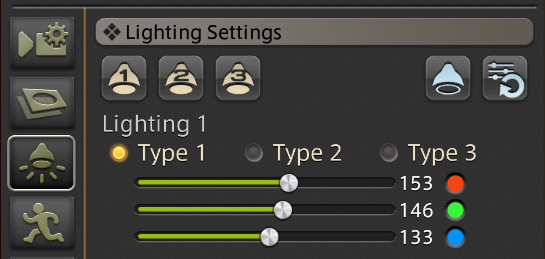
In the Lighting Settings tab you’ll find three free-to-place lights. Unlike the more limited settings we’ve covered so far, these lights can be placed almost anywhere around your character, with only your camera’s reach setting the boundary.
Beyond their flexible placement, these lights can also take on any colour, giving you endless room for creativity and mood-setting.
Lighting settings: placement
It’s simple enough: wherever your camera is positioned, pressing the light button places the light at that exact spot. It stays there until you remove or reposition it.
Because thes lights can be placed so freely, they’re incredibly versatile. You can highlight specific parts of a scene or create the illusion of natural light sources. For instance, placing a blue-toned light around a character can mimic moonlight and its reflection on the water.
You can also use these lights in conjecture with existing light sources. For example, I boosted the glow of a fire by adding a warm light to the character’s side, strengthening the effect without breaking the scene’s realism.
Lighting settings: Types
Once you select a light, you can choose between three types, each defining its size and intensity.

- Type 1 is the softest, ideal for gentle illumination from a short distance.
- Type 2 offers a middle ground between type 1 and 3. It’s neither too dim nor too bright, and works well for overhead or accent lighting.
- Type 3 is the strongest and widest, capable of lighting an entire scene from afar or creating bold, dramatic effects up close.
Lighting settings: colour sliders
Beneath the light types are three colour sliders—red, green, and blue. These let you mix colours and control their intensity. Lower values produce softer light, while higher ones create stronger, more vivid tones. The brighter the light, the more pronounced its colour appears.
Character Lighting
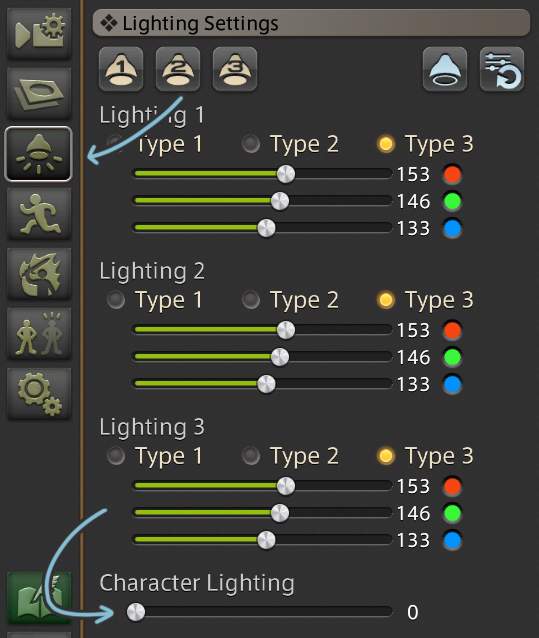
Underneath the individual light options you’ll find the Character Lighting slider. As the name suggests, this only affects your character and whatever they’re holding. Like all tools discussed, subtlety is key.
Turning it up too high causes two main issues. First, it flattens your character’s appearance. Too much overall light erases shadows and depth. While the image on the left is a bit underexposed, the character’s face is much more dynamic. Secondly, an overly bright character can clash with the rest of the scene, standing out in an unflattering way.
My recommendation is to not go above 25-30, and even staying between 10-20. At that range, the lighting feels balanced, and your charactger blends naturally into the environment. If they still appear too dark, adjust the individual lights or manual brightness instead.
Saving/loading your settings
Finally, you can save and load both your lighting and camera settings. At the bottom of the Gpose menu, you’ll find two arrow bottons. The first opens the Save window. From there, you can store your current lighting and camera setup, allowing you to reload it in future sessions—even after closing Gpose or the game itself.

Though the process is straightforward, the Save Preferences section can be a little confusing. It offers two options—Characther Position and Camera Position—which determine how your saved settings are reapplied.
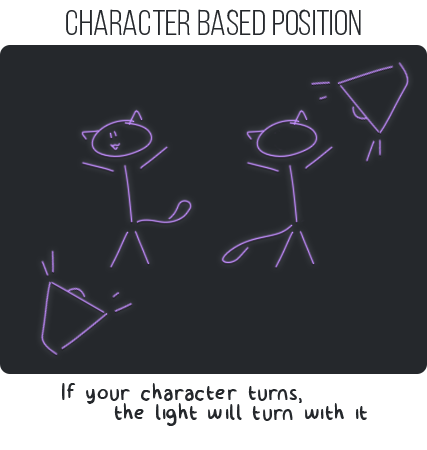
The in-game tooltip doesn’t explain this clearly, so here’s the gist: if you save with Character Position checked, your lights will reload relative to where your character is facing. For example, if you place a light in front of your character, then later rotate them outside of Gpose and reload the preset, the light will appear in front of their new facing direction, not the old one.
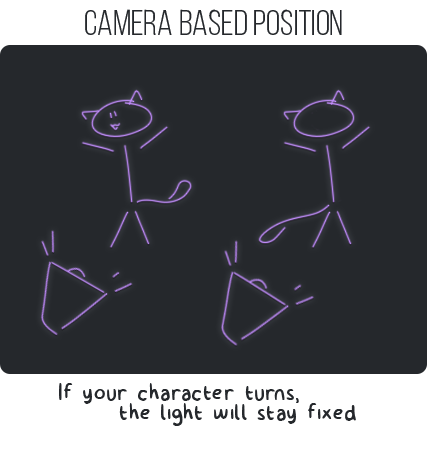
Camera Position, on the other hand, locks the lights relative to your saved camera view. The lights stay fixed based on the camera, not your character’s facing direction.
They still follow the character’s position, though—if you move your character, the lights move with them, but their angle won’t adjust. Instead, they maintain the orientation from when you originally saved them.
Combining settings

Let’s put everything we’ve learned to work and darken the screenshot above, which is clearly far too bright.
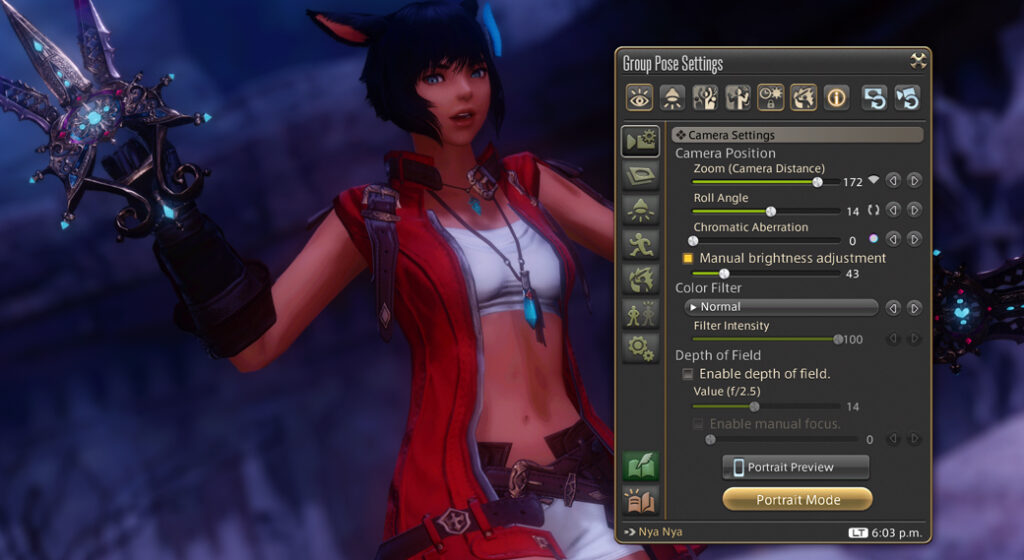
I’ll begin by lowering the Manual Brightness Adjustment slider to 43. As noted earlier, 100 isn’t a fixed default—it changes with each scene. Here, I’ve reduced it by about 30 points. It’s slightly too dark, but I’ll add manual lighting next.
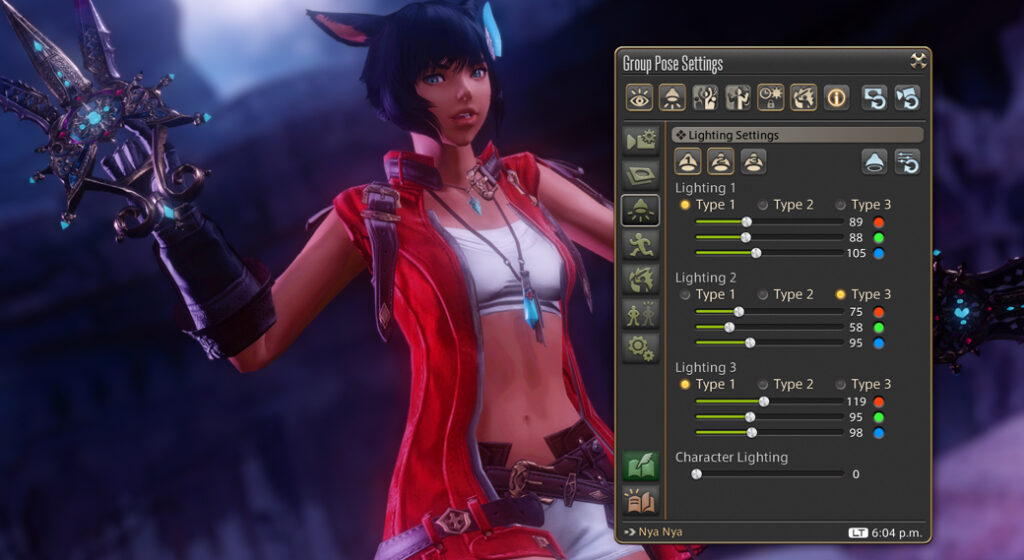
Next, I’ll consider the colour and placement of the free-to-place lights. The goal is to brighten the character while keeping the suggestion of nearby light sources. I’ve placed two lights. One behind her, and one to her right (our PoV). I’ve also given them a blue/purple tint to match the scene.
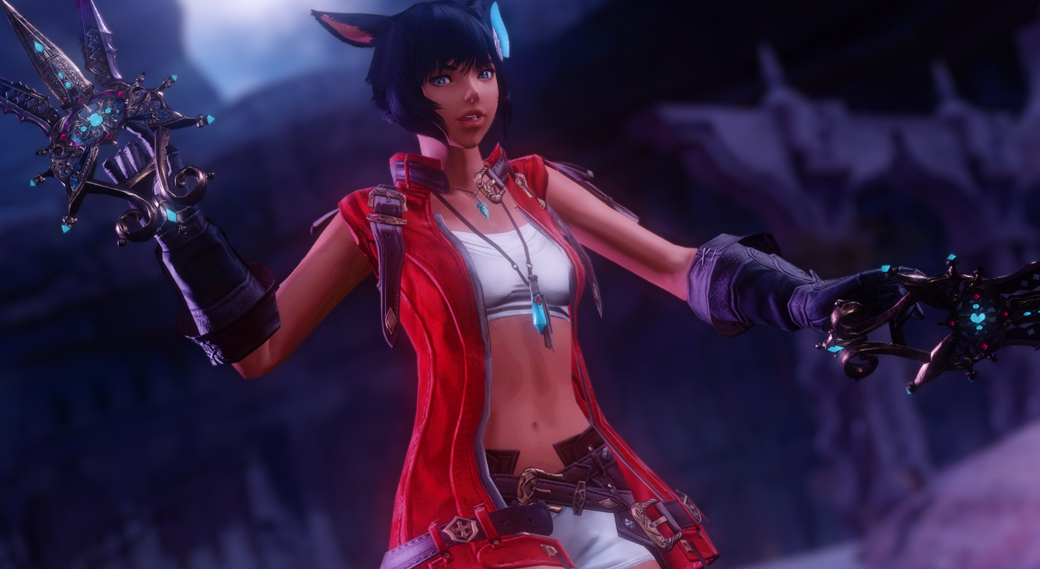
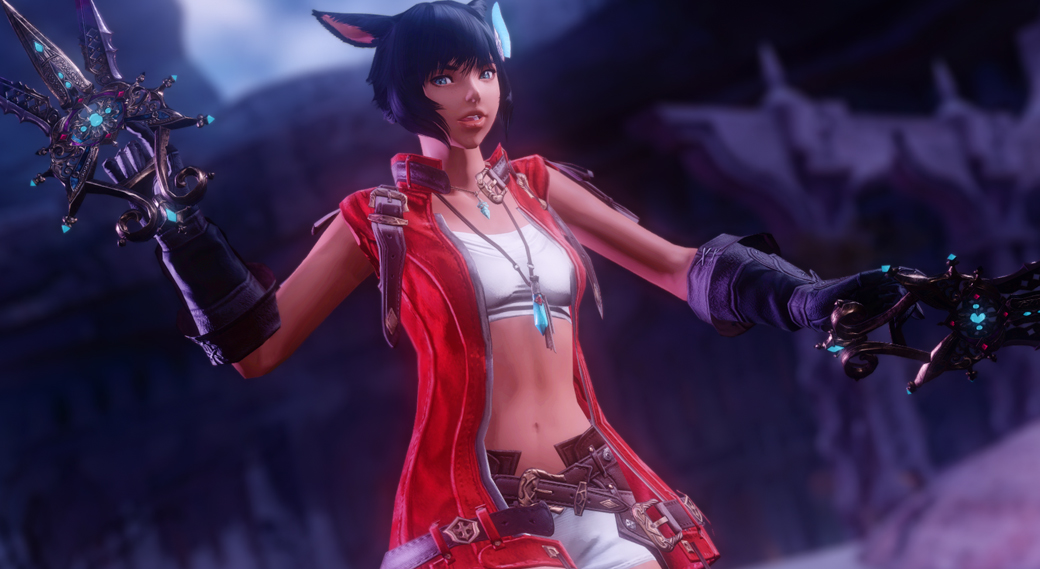
I’m not entirely happy with the result yet, so I go back and tweak it a little further, adding more overall brightness and intensifying the individual lights until I find the scene bright enough.
You can always go back and add more light (or reduce it).