Rim lighting, also called edge lighting, is a technique where you place a light source directly behind your subject to create a thin, bright outline. It adds contrast between the subject and the background, giving the image more depth and dimension.
This effect is fully achievable in-game, though positioning lights in Gpose can be difficult when you need precise placement. Fortunately, you can create the same effect in Photoshop with relative ease, which gives you far more control over where the light falls.
Taking the picture
We begin by taking two screenshots in-game. First take your regular shot, then take the same shot again with Chroma Key applied to the background.
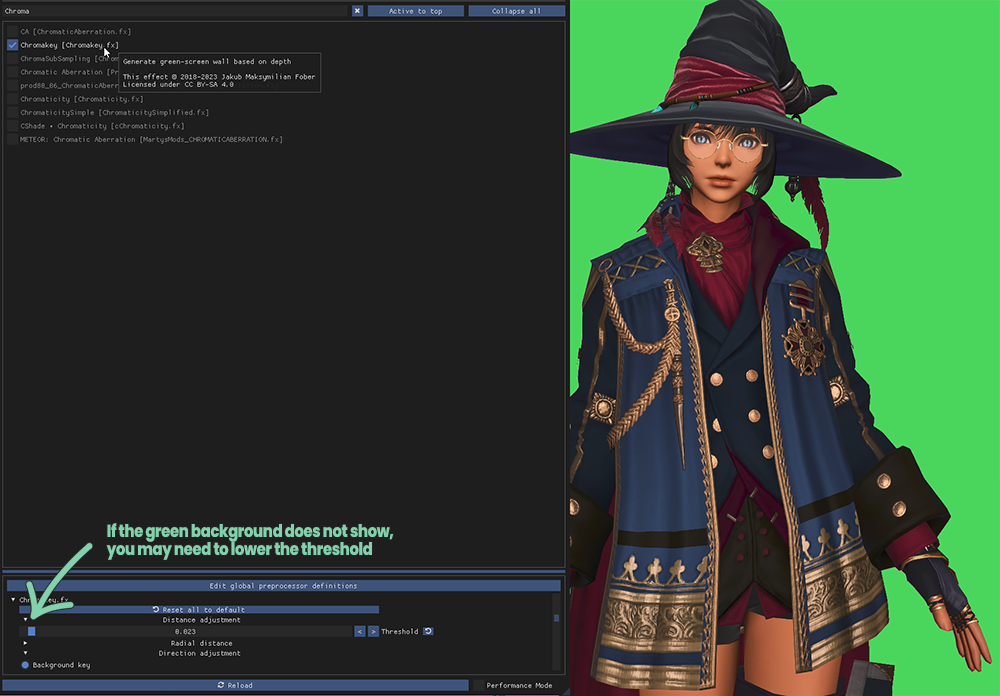
Do not use a different Shader Preset, simply enable the Chromakey Shader as demonstrated in the screenshot above.
If you do not use ReShade you can skip the second screenshot, although this will require a little more work in Photoshop.
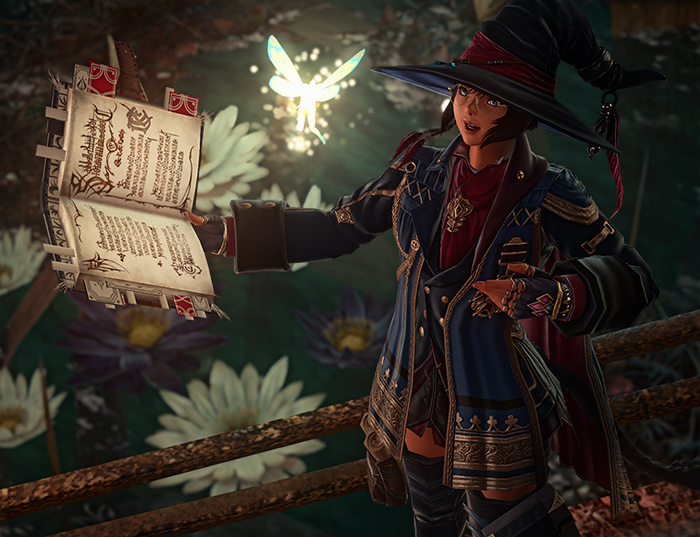
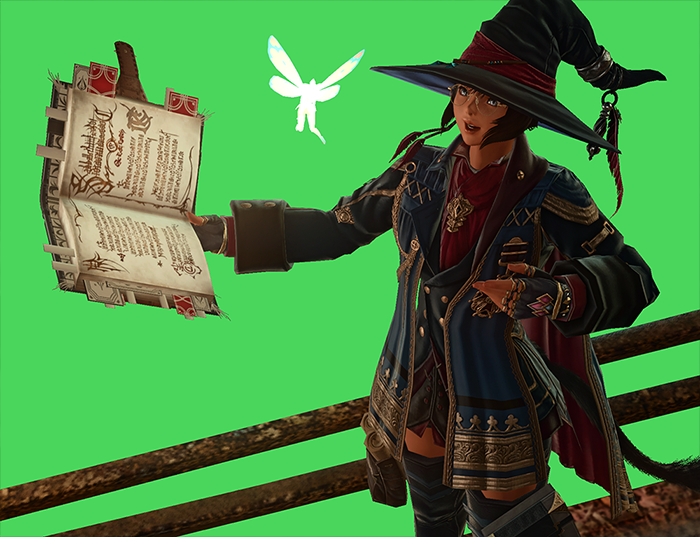
You should end up with two identical screenshots save for the background. The point is to make cutting out the subject easier.
Opening the screenshots in Photoshop
We now want both screenshots opened in the same Photoshop document. Begin by opening each screenshot separately. This creates two documents.
The easiest way to combine them is to copy one screenshot with CTRL + A followed by CTRL + C, then paste it into the other document with CTRL + V.
Removing the background
The green background helps us separate the character (or anywhere we want the rimlight to be) from the environment. To begin, we wish to make a selection. There’s two ways to do this.
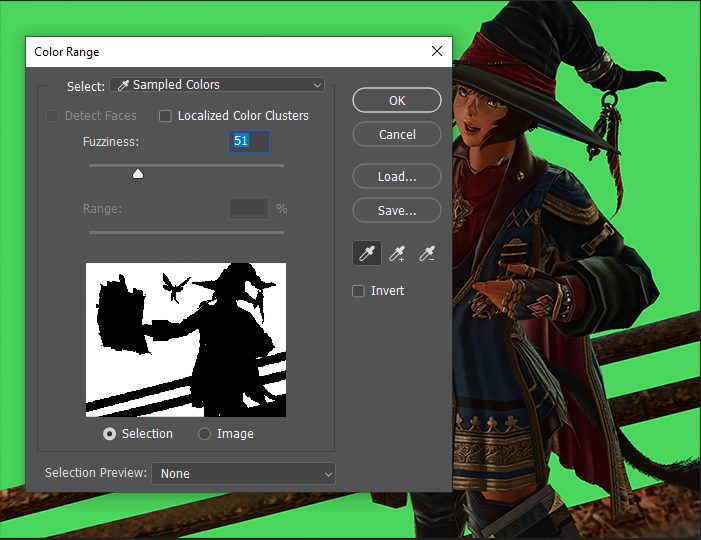
Version 1: Select > Color Range > Eye drop the green background.
We do not need a perfect selection for this step, so you can keep the fuzziness low.
Once the selection is made, right click it with any selection tool active (M) and click Select Inverse.
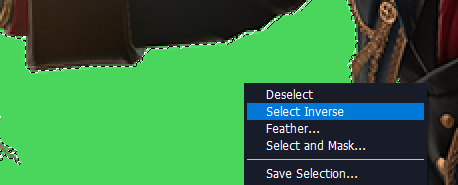
Version 2: Select > Subject.
This method can be used if you do not have ReShade or Chroma key. Photoshop will attempt to identify your subject and create a selection. It will not always capture everything, so you may need to add the missing areas yourself.
I prefer using the Polygonal Lasso Tool. Select the tool and hold Shift for your first click to add to the existing selection. After that first click you can release Shift and continue shaping the extra area.
The Polygonal Lasso Tool is not the cleanest option, and you may prefer something else. What matters is that you add any missing parts of your character to the selection.
Duplicating the first layer
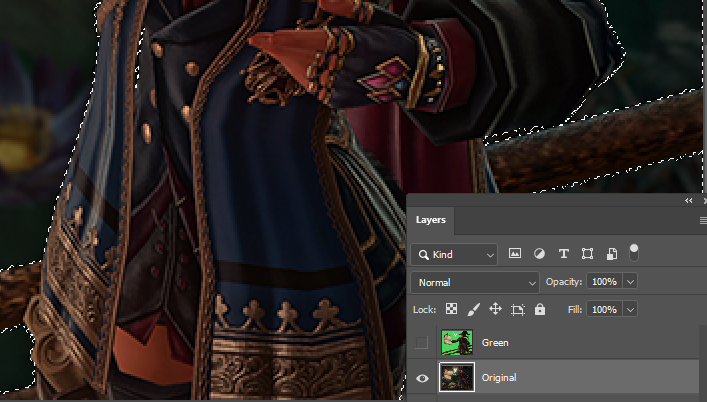
First, click the eye-icon in front of the green layer in the layers window. This will hide the green layer from view. We no longer need this. Then, with the selection still active, click the layer without the green background.
After having done this, press CTRL + J.

This has duplicated the layer we had highlighted, but only what we had selected. Now we have the character on a separate layer.
Applying the rim light
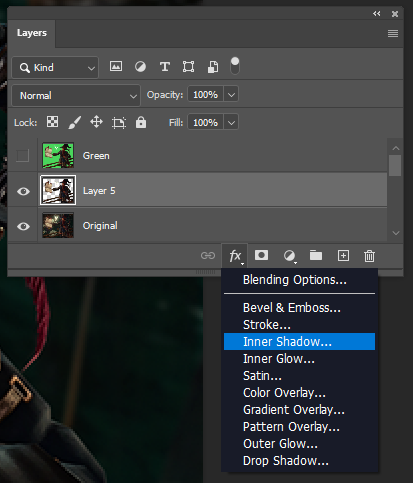
With the new layer selected, go to the bottom of the Layers window and find the “FX” button. In the drop-down menu select Inner Shadow.
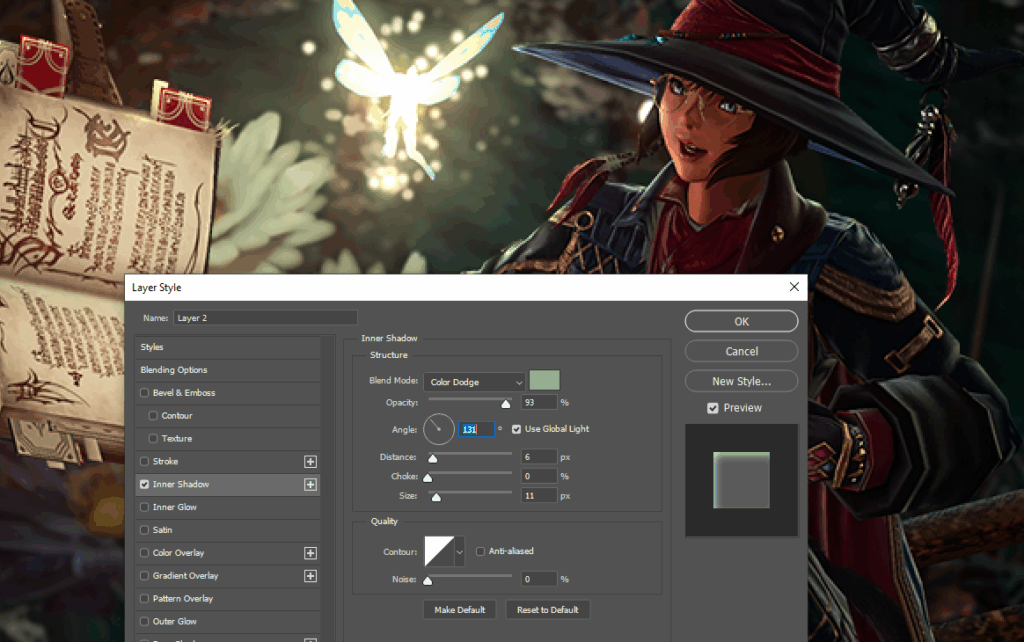
A window will pop up with a few options. We want to adjust the following:
- Blend mode: Set this to Color Dodge
- Color: Set this to whatever color the light source is
- Opacity: Control the intensity of the rim light.
- Angle: Set the angle in such a way that it looks like it’s coming from the light source.
- Distance: Keep this low. The rim light should only appear on the edge.
- Choke: Keep this 0. Setting it any higher may make it appear unnatural
- Size: Keep this low. Again,t he rim light should only appear on the edge.
Final adjustments
You may find that the result you’ve gotten from this isn’t entirely right; some areas of your subject that shouldn’t be highlighted like this might be. For this we also have an easy solution.

Start by selecting the layer with the subject. At the bottom of the layers window you will see a button with a rectangle and a circle inside of it. Click this to create a mask.

Select the mask on your layer. In your toolbar, set the top color to black, then, with the Brush Tool (B), you can now gently erase parts you don’t want highlighted. Make sure to set your brush to 0% hardness to get a more natural result. If at any point you remove too much, don’t worry, you can get it back by setting the color to white and brushing over it again.
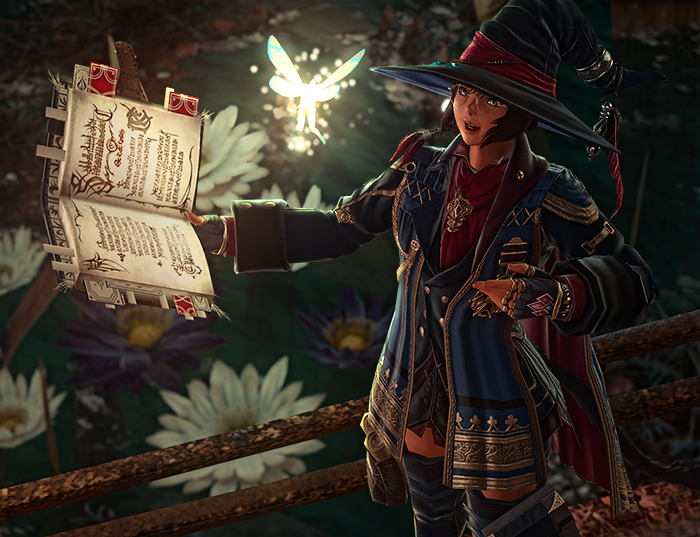
With that all said and done, you now have a beautiful rim light added to your subject.
