This guide is fairly straightforward and focuses on optimizing Photoshop for image editing. In short: here are some settings that may help Photoshop run more smoothly while editing screenshots.
While I’m personally someone who prefers to use either Photoshop or Lightroom, there are great free alternatives such as the Affinity software.
No matter what you end up using, I recommend picking something that has the following basic functionality:
- Cropping & resizing tools
- Colour editing options
- Editing filters (Blurs & Sharpens)
- Basic brush tool
- Content aware fill*
- Highlighting tool
- Grids & guidelines
*Preferred, not a necessity
SETTING UP THE UI
Photoshop can feel intimidating if you’ve never used its interface before. There are countless buttons that do something—and a plethora more you’ll likely never touch. Our first goal is to set up the interface so it only includes what we actually need. In other words, we want to simplify it.
Fortunately, the Photoshop UI is fully customizable. Anything you don’t need can be removed, and the less clutter you have, the easier it is to work.
I start by removing every window I can (excluding the toolbar). I click and drag the windows on the right and separate them, then press the X to close each one.
I separate them first so that when I bring a window back, I don’t accidentally restore several at once.
Next, I bring back the windows I actually need. To do this, I go to Window in the top menu. If you ever notice a panel is missing, this is where you can restore it. From the drop-down menu, I select the tools that are relevant for editing.
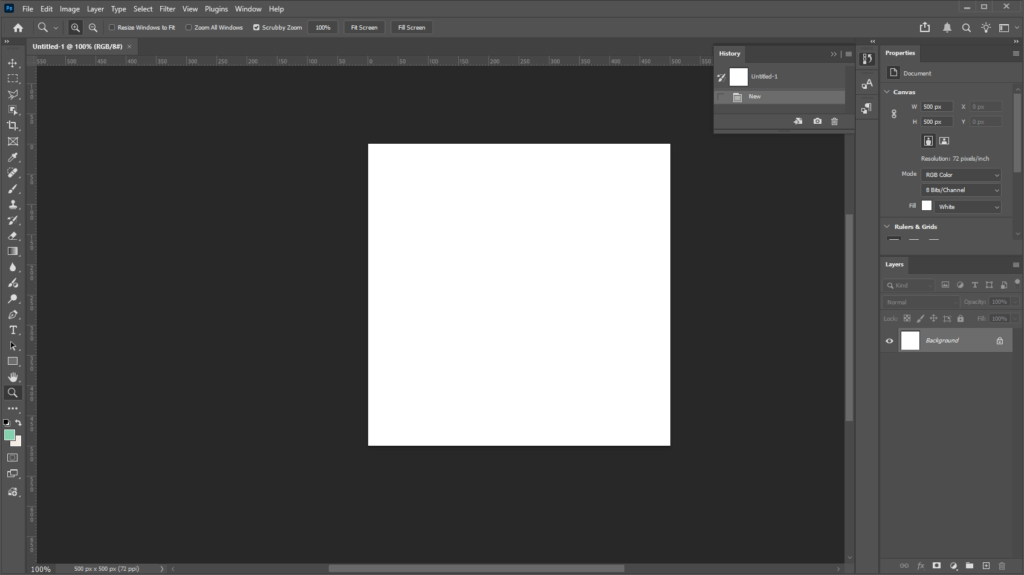
I’ve arranged my UI with the tools that are essential to me. I keep the Layers and Properties windows open on the right, while the other panels stay minimized since I don’t use them as often.
I’ve kept the setup this minimal to make the software feel less intimidating for new users. You’re, of course, free to add anything you find useful.
The following windows are shown in the screenshot:
- The toolbar
- Layers
- Properties
- History
- Paragraph styles (for text)
- Character styles (for text)
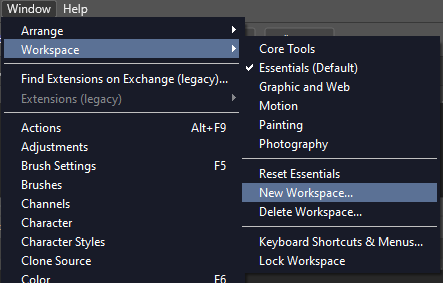
Once you’re happy with your workspace, save it by going to Window > Workspace > New Workspace. Photoshop can sometimes reset your layout, so it’s a good idea to save it.
Preferences
With our UI ready, it’s time to set some preferences. You can change your preferences by clicking Edit > Preferences > General or by pressing CTRL/CMD + K on your keyboard.
Interface
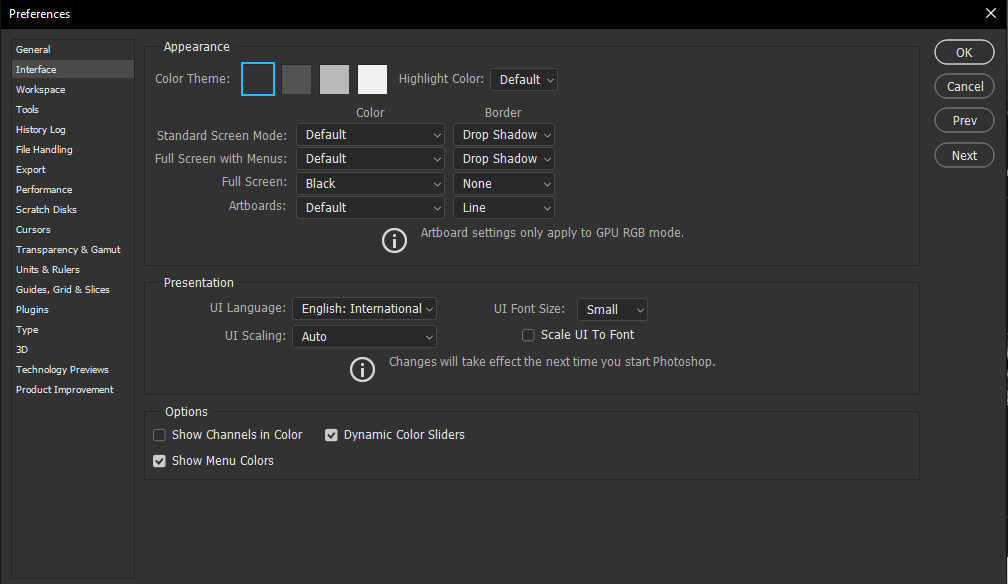
Here you can edit your interface; for example, you can set it to dark mode in the color theme menu.
File Handling
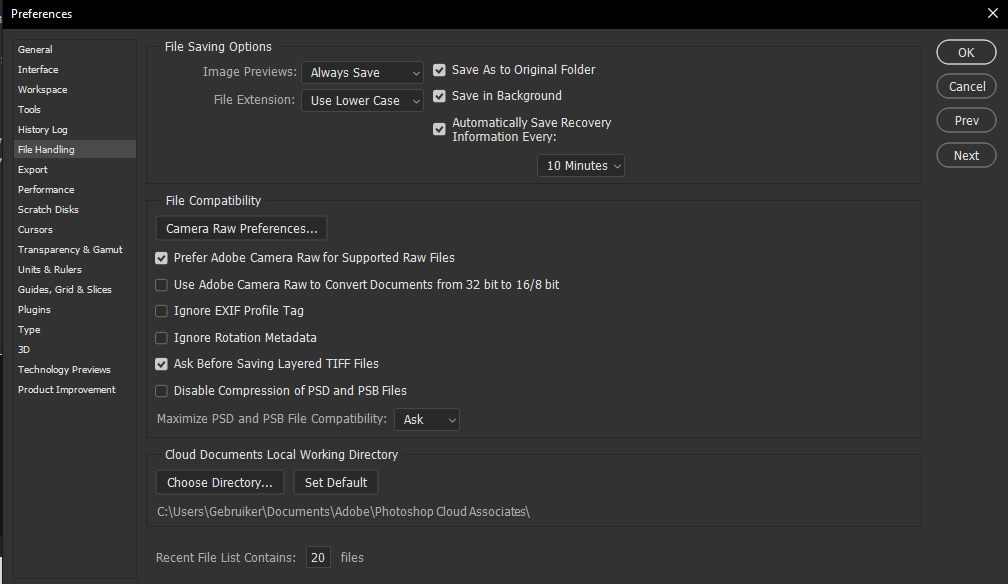
Ensure that “Automatically Save Recovery Information” is checked and set to a time you’re comfortable with. Photoshop crashes from time to time, this will ensure you don’t lose all progress.
Performance
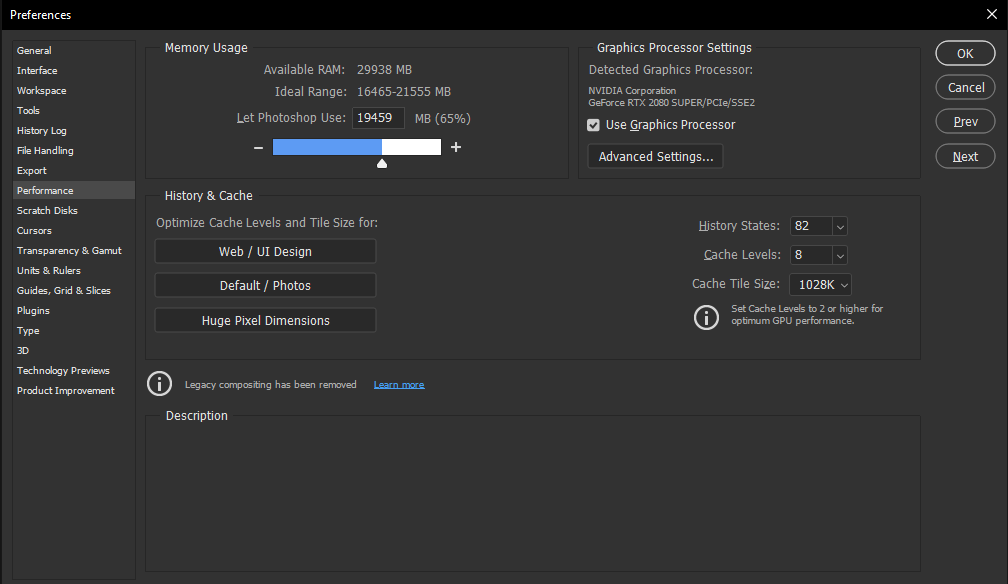
First, you can increase the amount of RAM Photoshop is allowed to use. Photoshop relies heavily on your PC’s processing power. You don’t need to allocate all your RAM, but giving it a bit more can help.
Next, you can enable GPU acceleration to boost performance. Unless your GPU isn’t supported, it’s a good idea to turn this on.
You can also adjust History states, which controls how many steps you can undo with CTRL/CMD + Z. Don’t set this too high, as it can impact performance. Around 100 steps is usually sufficient.
Finally, set Cache Levels and Cache Tile Size to maximum, since we’re working with large images and relatively few layers (most of the time).
Scratch Disks
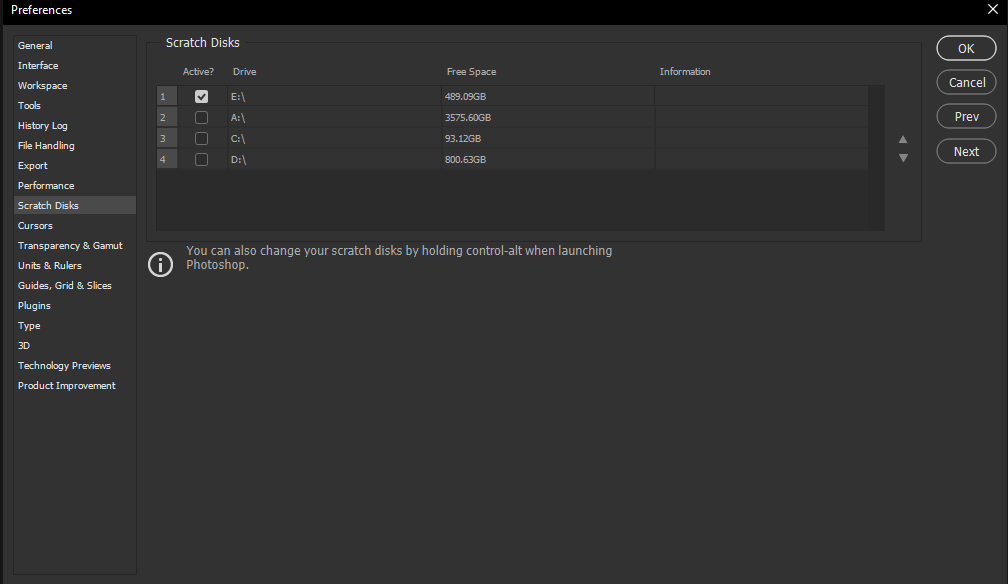
Photoshop creates temporary files that can become quite large. If these files are saved to a hard drive with limited space, you may run out of Scratch Disk space. This can cause an error, fill the drive, and prevent Photoshop from functioning until you fix it.
In the Scratch Disk preferences, simply select a drive with enough free space to handle large temporary files.
Units & Rules
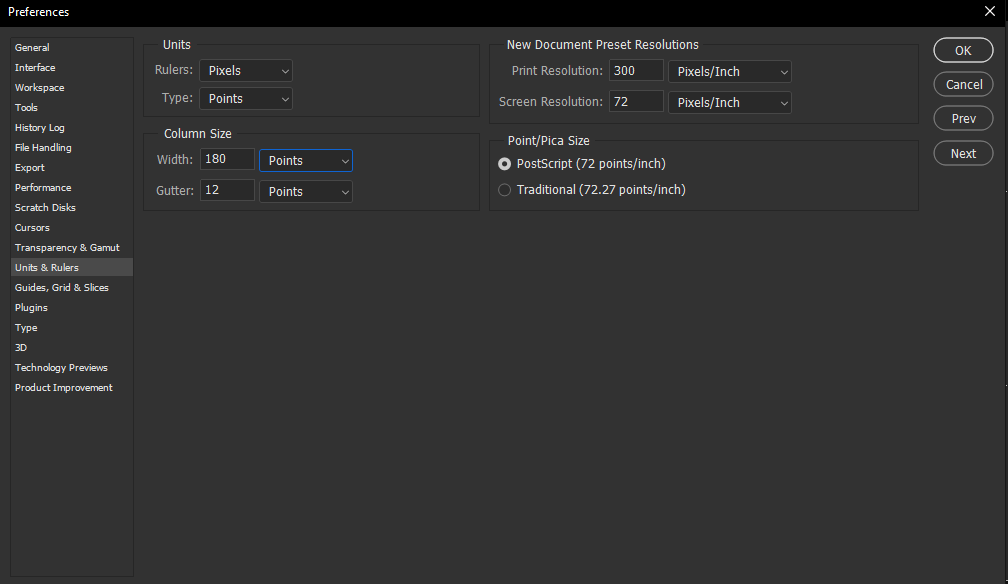
We’re editing images that will be displayed on screens—unless you are planning to rent a billboard. Screens use pixels, so for convenience we’ll set everything in this tab to use either pixels or points.
Guides, Grids & Slices
I like to add guidelines for the Rule of Thirds. This is completely optional, but it’s nice to have it set up.
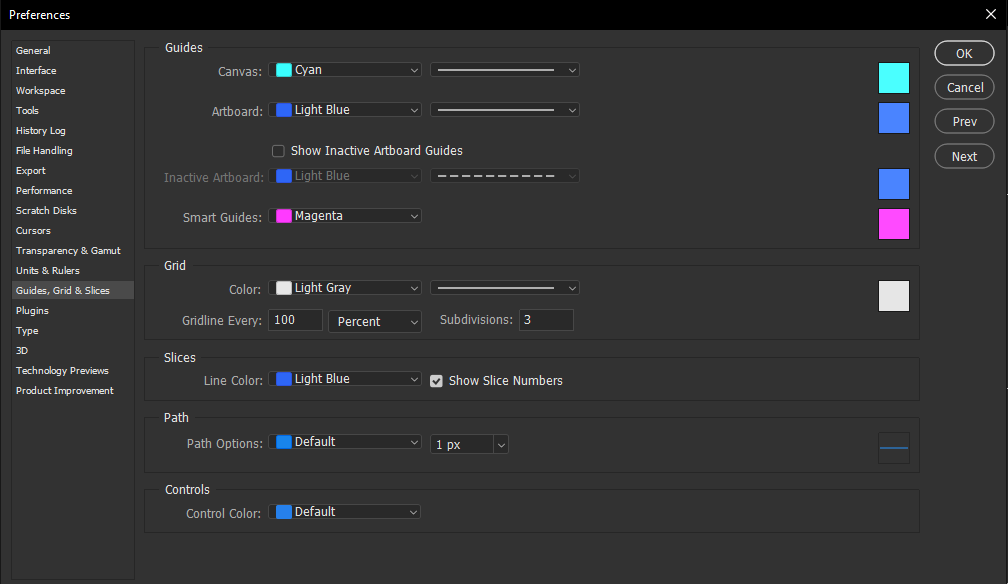
Under Grid, set Gridlines to Every 100% and Subdivisions to 3. Above these settings, you can choose whatever color and line style you prefer.
